Learn how to set up and host your RUST dedicated server for free.
This guide will teach you how to set up and host a RUST dedicated server with step-by-step instructions. Regardless of your technical level, you will find all of the necessary information to help you successfully get your RUST dedicated server running.
There are many reasons for wanting to create a new RUST server and many requirements, but these are easily met. Whether you want to set up and host your RUST dedicated server on your home computer or have it professionally hosted and managed, we’ve got you covered. Let’s get to creating your new RUST server!
Table of Contents
Why set up a RUST server in the first place?
There are many reasons for wanting to set up your RUST server. For many RUST players, they want complete control of their server so that they can manipulate the server’s rules, settings, modifications, physical location, and an untold amount of other reasons, such as:
- You just want a private place to play the game
- You are a plugin developer and need to test your plugin
- You design custom RUST maps and need a place to playtest your maps
- You are a content creator and need control over game elements or want to test features
- You are expanding or creating a new RUST server community
Whatever your specific reasons are, in this guide, we’ll help you to get a dedicated RUST server up and running.
RUST dedicated server hosting requirements
Before getting started, it’s a good idea to ensure that your computer can run the RUST dedicated server. Without enough RAM or a fast enough CPU, your server will perform poorly, and players will experience many problems from lag spikes, connection drops, and poor frame rates. RUST is not a multithreaded game, so having a processor with many cores won’t precisely benefit you in the ways you’d expect. An argument may be made if you’re hosting multiple servers from the same machine. Let’s cast that aside for now.
The RUST dedicated server can be quite demanding on system resources, and the number of resources you need can vary greatly depending on your scenario. To begin with, let’s look at the minimum resource needs for a vanilla installation of the RUST dedicated server with a small map size of 2.5 – 3km.
Minimum system requirements
- Windows, Linux, or OSX operating system
- 4GB of free system RAM
- 6GB of hard drive space
It’s important to remember that these are resource requirements just for the server—if you plan to use the RUST client on the same computer as the server, you’ll want at least 8GB of RAM available for the RUST client to use. This means you’ll want to use a computer with at least 16GB of installed RAM, as you’ll also need to account for the operating system and other background applications. Running a server locally on a machine with the minimum specifications is not recommended. While you can do it, it doesn’t mean you should.
As your map sizes increase and the server adds more entities throughout the gameplay and wipe cycle, your RAM needs will increase, so if you plan to go ham on base building with this server, you’ll need to consider getting more RAM to have available. Likewise, if you plan on adding plugins to create a modded server, this will also increase your RAM usage.
Recommended system requirements
As mentioned, resource usage can vary greatly depending on how populated your server is, how many entities have accumulated, how many plugins are installed, how big the game map is, and any additional tooling you may be using, such as hosted Discord bots or other such necessities, and so on. If you run your RUST server on a computer that barely fits the minimum requirements, you risk bottlenecking performance once your resource needs increase. This can lead to high latency responses and server stalls.
- 8GB+ dedicated RAM
- 6-8GB HDD space (SSD/NVMe if possible for best performance)
- 3.5+ GHz CPU
- Free archive/compression tools like Winzip or 7zip
Contributing factors for resource usage:
- Map size
- Number of plugins in use
- Entity count
- Number of players
- Additional tooling & monitoring
Network capability and connectivity
If you plan to create a RUST server for other players to join you, you must ensure that your network connection can handle the traffic. A dedicated server will accept connections as long as it is running, which means that your personal or home network (depending on the location of your server) will be hosting that traffic. If you are on a slow or throttled network, it may be difficult for others to connect and stay connected to your dedicated RUST server.
You’ll need to open ports on your firewall to allow outside connections to your server, requiring the necessary administrator permissions. This guide will cover the required port setups, but opening ports for your particular OS and router is out of scope. Please refer to the documentation for your chosen OS on how to open or port forward correctly.
Download and install SteamCMD
SteamCMD is the recommended method for acquiring the RUST dedicated server files. It is a free command-line utility provided and maintained by Valve and is the easiest way to ensure that you’ve got the most up-to-date version of the RUST dedicated server files from Steam.
Note: This guide will be specific for a Microsoft Windows installation.
Step 1: Prepare for the SteamCMD installation.
Create a new directory where you will install SteamCMD. This guide will install everything to the C: drive for consistency, but you can install SteamCMD on any local drive you desire.
C:steamcmd
Step 2: Download SteamCMD for your system
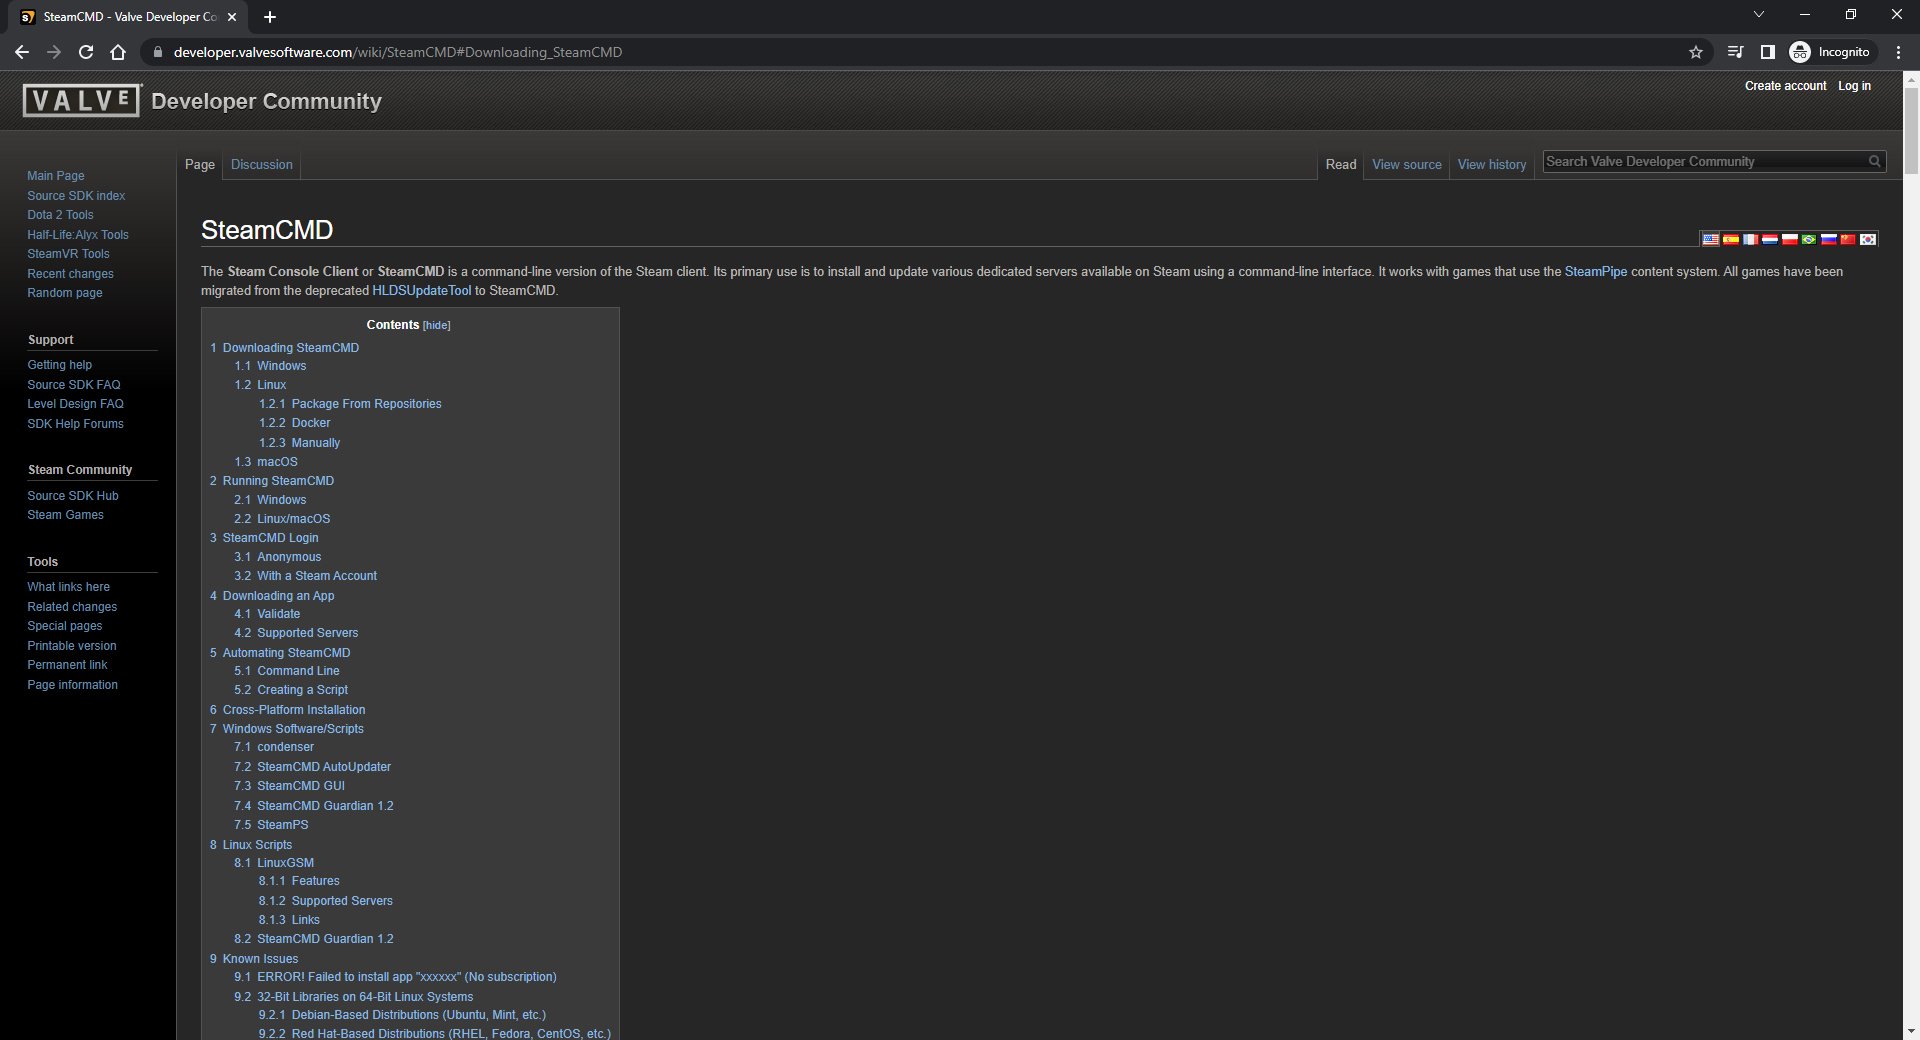
SteamCMD is available for a variety of operating systems. Download the version for your operating system from Valve’s developer page: download SteamCMD.
From the SteamCMD download page, scroll down to the section for downloading SteamCMD for Windows. Click the provided link to download the zip file containing the SteamCMD installation.
Once the download is complete, open the zip file and extract the files into the ‘steamcmd’ directory you created in the previous step by dragging them from the unzipped archive to the new directory.
Step 3: Run SteamCMD
Once the installation has been completed, you may now run SteamCMD, by double-clicking on the file. Every time you run SteamCMD, it will check for updates and automatically download any updated files to ensure that everything is up to date.

Once the updates are complete, you will be put into the Steam shell prompt. With that, you are ready to begin this guide’s RUST download and installation phase.
Download and install RUST Dedicated Server
Now that SteamCMD is installed and updated, it’s time to do the same for the RUST dedicated server.
Set the install directory
To begin, SteamCMD wishes to know where you will be installing the RUST server. We do this using the force_install_dir followed by the full path to the server location. For our installation, we’ll be creating the directory as C:rust_server You can name your server directory anything you like.
Into the Steam prompt, enter the following:
force_install_dir
Where
force_install_dir C:rust_server
Pay careful attention to the direction of your slashes; if you are on Windows, ensure you are using backslashes, and on Linux or Mac, make sure you use forward slashes.
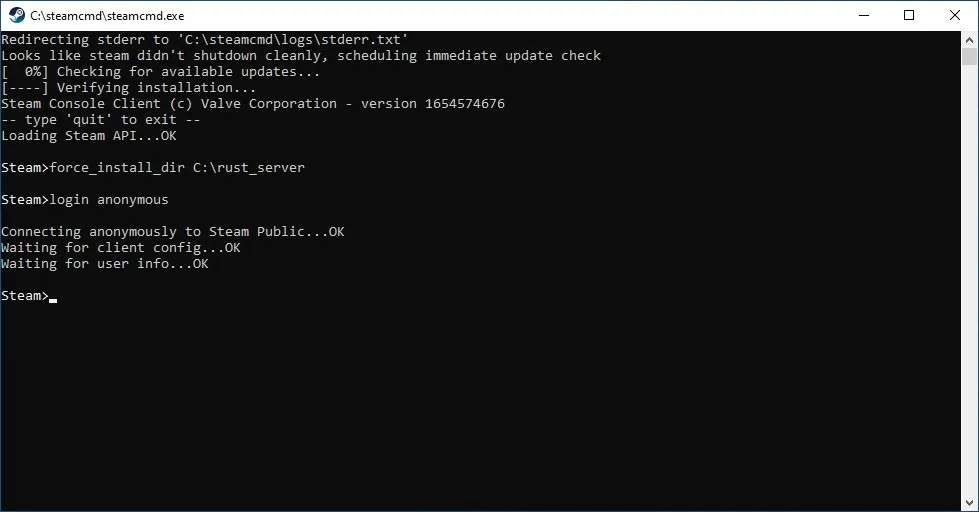
Once you’ve run the above command, there will be no feedback inside the console. You can check the directory and see that the folder has been created.
Login to Steam
RUST does not require using a Steam account to download and run your server; this is only a requirement if you wish to play using the RUST client. The following commands will log you into Steam from the SteamCMD prompt anonymously:
login anonymous
Next, we need to install the server files. RUST dedicated server has the Steam app ID 258550, which is how we’ll tell SteamCMD which server we want to install. There are additional parameters we can set at this time, but for starters, here is how to install the default release branch for RUST:
app_update 258550 validate
We’re adding the validate command as a recommended step we use on our servers. Validate tells SteamCMD to check the local server files to ensure they match what is present in SteamCMD. Validate will download any files it detects to be corrupted or missing on the local server, saving the server owner time and frustration from unnecessary troubleshooting and server restarts. It’s a highly recommended command to use.
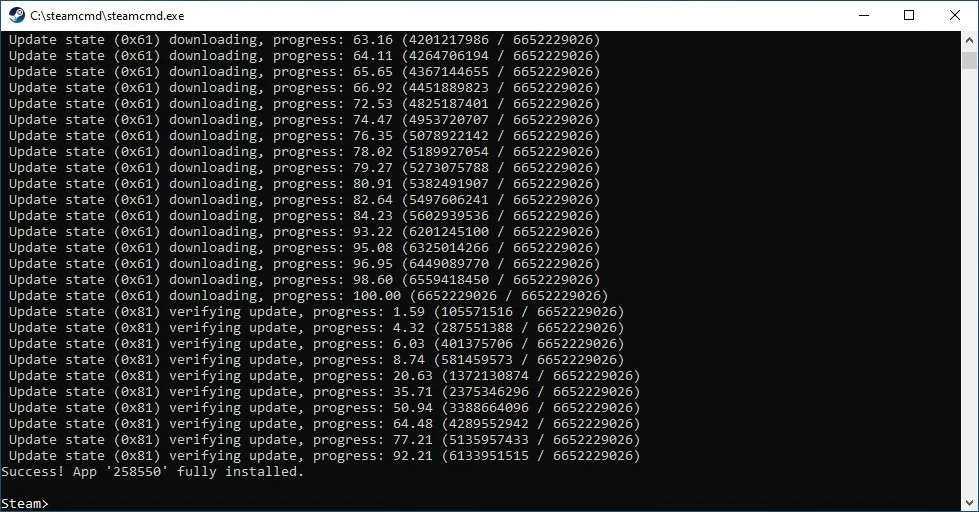
Running app_update will begin the download for the dedicated server. First-time installations will take a while, so prepare for a wait. SteamCMD will post a success message stating that app 258550 is fully installed when the update is complete.
Choosing other RUST dedicated server branches
In addition to the release version of the RUST dedicated server, it is also possible to install and run a staging or pre-release server version. The staging branch is generally the RUST version containing features in the game’s next major update.
Staging branch servers are intended to collect playtest feedback on new features before merging into the release game. Check out our staging branch guide to learn more about staging and how to play on a staging branch server.
To set up your RUST dedicated server as a staging branch or pre-release branch, modify your app_update command to the following:
Staging branch
app_update 258550 -beta staging validate
Pre-release branch
app_update 258550 -beta prerelease validate
Running these app updates will download the server files for the chosen branch. If you are running this app_update for a staging branch and previously installed a release version of the server in this install location, SteamCMD will overwrite your server files with the staging files. Keeping these in separate server directories is best if you plan to have both a release and a staging version of the RUST dedicated server on your machine.
Server installs cheat sheet.
Here are the complete install steps for each RUST dedicated server branch as a shortcut. Just swap out
RUST Release branch
force_install_dirlogin anonymous app_update 258550 validate quit
Rust Staging branch
force_install_dirlogin anonymous app_update 258550 -beta staging validate quit
Rust Pre-Release Branch
force_install_dirlogin anonymous app_update 258550 -beta prerelease validate quit
Configure your dedicated RUST server and run it
By this point, you’ve successfully installed the RUST server of your desired branch. Located inside the C:rust_server folder, you should now see a similar folder structure.
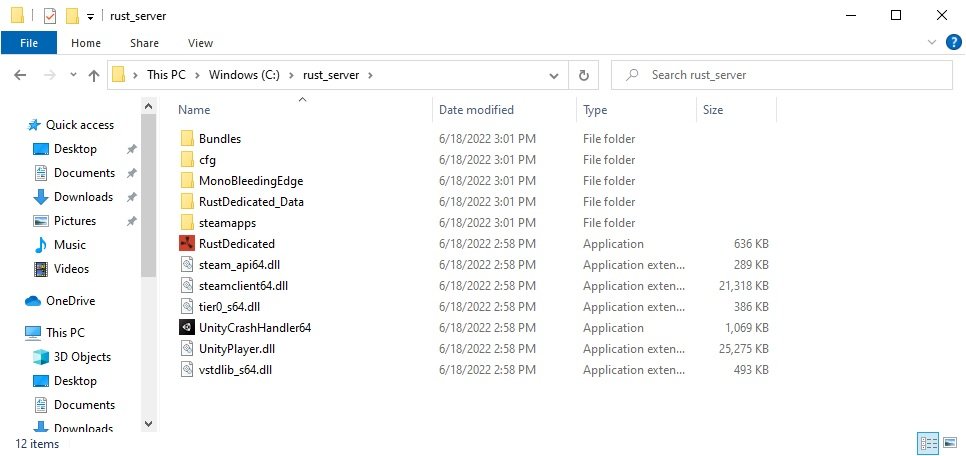
Once confirmed, you can technically run the RustDedicated.exe server. However, simply running it at this point will result in a wasteful use of system resources and a stateless server.
We’ll next create a startup script to run the server in headless mode and input startup parameters so we can configure, customize, and maintain server settings every time we start and stop the server.
Run the RUST dedicated server in batch mode
As the name implies, the batch mode allows us to run the server by providing many, or a batch, of commands and console variables (convars) without inputting them individually. The batch mode tells the Unity game engine to run the server in a non-GUI mode, which removes the need for human interaction. This flag also enables us to script the server’s startup, saving us time, typos, and sanity.
Here is the starter batch script we’ll be working from for this guide:
@echo off
:start
C:steamcmdsteamcmd.exe +force_install_dir C:rust_server +login anonymous +app_update 258550 validate +quit
RustDedicated.exe ^
-batchmode ^
-server.port 28015 ^
-server.queryport 28016 ^
-rcon.port 28017 ^
-app.port 28018 ^
-server.level "Procedural Map" ^
-server.seed 1 ^
-server.worldsize 4250 ^
-server.maxplayers 100 ^
-server.hostname "Server title" ^
-server.description "Server description" ^
-server.url "https://yourwebsite.com" ^
-server.headerimage "https://yourwebsite.com/serverimage.jpg" ^
-server.logoimage "https://yourwebsite.com/serverlogo.jpg" ^
-server.identity "MyServerName" ^
-rcon.ip 0.0.0.0 ^
-rcon.password "abc123" ^
-rcon.web 1 ^
-logfile "logfile.txt"
goto start
Copy this text into a plain text editor like Notepad, and save the file as startup.bat. Save the file in the same directory as your RUST server’s RustDedicated.exe.
We’ll go over the parts of this script so that you are equipped to understand the changes you’ll need to make to it for your own server’s setup.
Breakdown of the batch file parameters
echo off
:start
This bit says that we don’t need commands repeated or echoed to the console. The start line is a label so that we can form a loop in our script and tell the script where to loop back.
C:steamcmdsteamcmd.exe +force_install_dir C:rust_server +login anonymous +app_update 258550 validate +quit
This line is the SteamCMD install steps for updating the server files if changes are detected.
This line performs the following actions:
- Executes the steamcmd.exe application along with the trailing parameters
- Sets the force_install_dir (i.e. installation directory)
- Logs in to Steam anonymously
- Specifies the unique RUST SteamID to install & update from
- Validates the files to ensure none are missing or corrupted
- Quits SteamCMD once the operation is complete
Note: If you’ve installed SteamCMD in a different location, you must change the corresponding path to steamcmd.exe. Likewise, you’ll also need to update the path to your RUST server for the force_install_dir command.
RustDedicated.exe
This is where we begin feeding convars and settings into our RUST server. Note that RustDedicated.exe is not preceded by a path; the batch file needs to be in the same directory as the executable. Otherwise, you’ll need the full path to RustDedicated.exe entered.
batchmode
The batchmode parameter is a flag that tells the Unity engine to run in a non-GUI or otherwise headless mode.
server.identity "myserver"
The server.identity convar allows you to set the directory’s name where your server’s config files, player blueprints, save files, map files, etc., will be stored. Make sure your server identity contains no special characters, including spaces. Also, if you run multiple servers on the same machine, it’s critical that you modify this to be a unique value.
server.port 28015
The server.port convar is where players will connect to the RUST server. The default port is 28015, but if you need to use a different port number, change this value to the port you wish to use. Just be sure there are no conflicts!
server.level "Procedural Map"
The server.level convar is where you determine what type of map the server will use. To use a procedural (procgen) map, leave the convar as is. For more information on setting the server level convar for custom map setups, see our rust server levelurl command guide.
server.seed 1024
The server.seed convar sets a specific seed that controls what map is rendered, in conjunction with the server.worldsize. The seed must be a numeric value.
server.worldsize 4000
The server.worldsize convar controls the size of the world map and is used in conjunction with the server.seed convar. It must be set as a numeric value. Supported world sizes range from 1000 up to 6000. The default map size is 4000, but Facepunch recommends a minimum of 4250 for most procgen roads and railways to be able to spawn comfortably.
server.maxplayers 10
The server.maxplayers convar specifies the maximum number of players that can join your server before being placed in a connection queue. Set this to a value with your server resources in mind–if your server hits max capacity, you want to ensure that you’ve got the resources available to provide a smooth experience for all connected players. Also, note that admins and moderators can connect when set to a value of 0.
server.hostname "Displayed in the Server Browser List."
The server.hostname convar is essential to include since this is the primary method for how players will find your server in the server browser listing. Please refer to our RUST server hostname guide for important information about crafting an effective server name that will attract players and adequately describe your server.
server.description "Displayed in the Server Connection Window.nSecondary text."
The server.description convar enables you to provide information to potential players about your server and its rules, how to contact admins for help, the wipe schedule, and more. n is used to create break lines and spaces. Please review our RUST server description guide for ideas on what you can include in your server’s description.
server.url "https://yourwebsite.com"
The server.url convar allows you to attach a website for your server’s community, you can provide an optional link to it using this convar. Setting this value will generate a button on the connection window for players to click and visit your website.
server.headerimage "https://yourwebsite.com/serverimage.jpg"
The server.headerimage convar is an optional setting but important for developing a sense of permanence for your RUST server and its brand. You can place any public URL here; it doesn’t have to be from your own website. Check out our RUST server headerimage guide for more information on sizing and developing the header image players will see on your server’s connection screen.
server.logoimage "https://yourwebsite.com/serverlogo.jpg"
The server.logoimage convar is an optional setting, similar to the server.headerimage convar, but allows you to set a small logo on the connection screen and the RUST+ Companion app. This image can be a transparent png, gif, or jpg and must be within 256×256 pixels.
rcon.port 28016
rcon.password "abc123"
rcon.web 1
The three convars above are for setting up RCON access to your RUST server. RCON is a protocol for remotely executing commands on a server. RUST uses this protocol to enable server owners to interact with their servers without direct access to the server’s console.
To enable RCON, set rcon.web to 1. The default RCON port is 28016, but if you need to change it, you will do so by updating this value. Be sure to set a secure password for your RCON connection because RCON gives anyone with access control over your server.
Important note about RCON passwords
Please, please, please do not use the example password you find in this setup guide or other guides provided by other websites. These are the first passwords that bad actors will try if they are attempting to gain access to your server. Please don’t make it easier for them. Use a password generator to create a secure password each and every time you create a new RUST server.
Start up the RUST dedicated server.
You’ve created everything you need to set up and run a functioning RUST server by this point in the guide. You can now start your server using the startup.bat file you created in the previous section instead of running RustDedicated.exe.
Running the bat file will open a terminal, and SteamCMD should begin looking for RUST server updates. If updates are available, SteamCMD will download them into your RUST server directory. If not, SteamCMD will gracefully quit and begin the batch mode startup of your server.
Server startup may take several minutes, especially if you’ve elected to use a large map size or your server has accrued many entities. The server will be loaded and ready when it can take console commands. Enter status into the console, and it should return a variety of data about the server. If so, it’s ready for you to connect.
Connecting to your RUST server
Now that the server is up and ready to make connections, it’s time to load up your RUST client and connect!
Connecting to a local server
You can connect via localhost if you’ve created your RUST dedicated server on the same machine as your RUST client. You won’t be able to see your server on the Server Browser, especially since we did not open ports to the public at this point, so you will need to connect via the game console.
Once the RUST client has loaded, press F1 to bring up the game console. In the console, enter the following:
connect localhost:28015
If you changed the server port in your batch file to something other than 28015, use that port value instead.
connect localhost:your-port-number
Once you hit enter, RUST will begin loading into your localhost RUST server. You will be able to monitor the connection progress from the server-side by checking the server’s console and noting that your Steam user has connected.
Many users note that the server connection screen for their localhost server displays Amsterdam II instead of their custom server description. This is a known bug with localhost servers and is nothing to worry over. There are talks underway that Facepunch will address this soon.
Connecting to a remote server
If your RUST server is on a different machine than your RUST client, you will need to know the machine’s IP that the RUST server is running on.
You can use a website like https://www.whatismyip.com/ to check for your public IP.
In addition to knowing the server’s IP, you’ll need to ensure that the necessary ports are open to allow inbound connections. This is a process called port forwarding, in which your server machine’s firewall and the router will need to open these ports to allow outside connections to be made. See this quick and easy-to-follow guide for port forwarding for RUST.
There are various operating systems your server’s hardware might be running on, and we encourage you to search for a guide to opening ports in your specific operating system.
You can verify that you’ve successfully opened the ports for your RUST server by checking with a tool like Southnode’s Steam query. If you see your RUST server display when querying your server’s IP, you’ll know that the server is ready to accept connections.
To connect to your remote server, bring up the F1 console from inside the RUST client and connect using your server’s IP and port.
connect serverip:serverport
Adding admins and mods to your RUST server
Now that you’ve got a RUST server up and running and players can connect to the server, you may be wondering what’s next on the to-do list?
Depending on your intentions for the server, you’ll likely need to add at least one administrator. If your server is intended for content creation and recording, or if you are building a custom map or plugin, you’ll likely want or need admin permissions for your player account. If your server is for your community to play on, you’ll probably want several admins and moderators to help manage the server.
Adding admins to the server
Administrators are added to the RUST server using the ownerid command. To use this command, you will need to use the Steam64 ID of the player you are elevating to the owner.
Enter the following into the server’s console:
ownerid “64_bit_steam_id” “optional_user_name” “optional_reason”
Once you’ve added an admin using the ownerid command, the user will have to disconnect from the server (if they are connected) for the auth level 2 to take effect.
To preserve this admin setting, you’ll need to update the server config so that the next time the server restarts, your admins can connect with auth level 2 without re-running the ownerid command.
Enter the following into the server’s console:
server.writecfg
For more information about adding RUST admins to a server, please see our guide to Adding admins to a RUST server.
Adding moderators to a RUST server
Adding moderators to your RUST server is similar to adding administrators. You’ll need the Steam64 ID of the user you wish to make a moderator and enter the following at the server’s console:
moderatorid "64bit_steamid_here"
Once you’ve added the moderator, you’ll want to save the server configuration:
server.writecfg
If the moderator is on the server at the time, you’ll need to disconnect them before they can assume moderator permissions at auth level 1.
For more information about adding moderators, see our guide to Adding moderators to a RUST server.
Removing admins or moderators
If the situation arises, you may need to revoke admin or moderator permission on your RUST server. To do so is very similar to adding them–you’ll need their Steam64 ID and access to the console.
To remove admins:
removeowner "64bit_steamid_here"
server.writecfg
To remove moderators:
removemoderator "64bit_steamid_here"
server.writecfg
The admin or moderator in question will still have their current auth level permissions until the next time they join the server. If the current situation requires immediate removal, you may wish to kick the player to remove their abilities forcibly. See our guide to kicking players for specific information about kicking.
Next steps for your dedicated RUST server
By this point in the guide, you’ve created a vanilla RUST server to which you and other players can connect, and you’ve added any necessary admins and moderators. From this point on, your server is completely playable as a vanilla experience.
The following sections of the guide are optional but recommended in many cases as they can make the administration and management of your server easier. Additionally, if you are looking to create a modded experience, there are additional steps you need to take to be able to add plugins to modify your server.
Installing uMod for server modding with plugins
To add plugins to your RUST server, you first need to install uMod. Previously known as Oxide, uMod is a modding framework that allows plugins to add or change functionality within RUST.
The following guides will aid you in getting your RUST server set up for creating a modded experience.
RCON administration tools
RCON is a protocol for executing commands on a remote server. Games like RUST that enable the use of RCON allow server admins to send remote commands to their server. To enable RCON connections on your RUST server, you must configure the following convars:
- rcon.port
- rcon.password
- rcon.web
Many server owners utilize an RCON tool for managing their RUST servers for various reasons. One such reason is convenience: if you manage many RUST servers in a variety of hosted locations, it is nice to be able to interface with them from one unified application. Tools like Battlemetrics and RUST Admin make it easy to add all your servers to one dashboard for monitoring and administration. Utilizing triggers to enforce your server rules automatically removes the need for an admin to monitor for violations manually.
Another reason for choosing an RCON tool is server security. Most RUST admin commands can be carried out via the in-game console or RCON, meaning you don’t need to give your admins direct access to the server’s console where they could potentially cause the server console to hang. Depending on your hosting setup, your billing info may be accessible, which you wouldn’t want your admins to access.
Set up the RUST+ Companion App Port
The RUST+ Companion App was introduced in May 2020 and allows players to monitor the status of their server, team, and bases. This will enable them to stay connected to the on-goings of the game while they’re away. RUST+ utilizes the Companion Server to allow communications with RUST servers.
Server owners can choose to enable the Companion Server by making the specified TCP port available. The default port is 28082 and can be verified by running app.info in the server’s console to verify. You can specify (or change) the port for the Companion Server using the convar app.port in the server configuration file (or batch file). If you choose to enable this feature, it’s good practice to have this in your configuration file, even if it’s the default value, to serve as an indicator/reminder.
app.port 28082
If it’s required that you change this value, it must be set to a value greater than 10000 due to Facepunch’s backend requirements. It also requires a server restart to take effect.
The Companion Server creates a companion.id file in the server’s save folder, which contains map files, blueprint files, and other such items. This file is sensitive and critical, as it’s used as the unique ID for your server when communicating with the RUST+ servers. Keep it backed up and safe from others who do not need access. You will not want to delete or remove the companion.id file between wipe cycles, as it could have negative repercussions.
That’s a wrap!
Now that your server is up and running and players are connecting, you may wonder what else is available. Be sure to browse our RUST Admin Commands and Variables list, which can help you configure and moderate your server(s).
If you have any issues with the steps in this guide or need extra assistance, please contact us on our Discord; we will be happy to help where we can!
https://www.corrosionhour.com/host-rust-dedicated-server/