Dedicated servers in Valheim could make the open world expertise extra pleasing when it is explored alongside pals. Here’s how to set one up.
Valheim is without doubt one of the newest video games to enter early entry, and it’s taken the gaming world by storm. Players are having fun with their time studying all the recreation’s mechanics and constructing bases throughout the procedurally generated world set in a Viking fantasy realm. There are a plethora of monsters and managers to combat all through Valheim‘s distinct biomes, which gamers can combat alongside their pals whereas constructing their very own cities, fortresses, and castles. With the sport nonetheless being labored on, there’s much more content material to come sooner or later as mechanics are being updated and added continuously.
One approach that gamers can expertise this new recreation with pals is by making a devoted server, in order that progress could be made with out the server host’s presence. Luckily, there’s a approach for followers to create one that does not take very lengthy! It’s attainable that someday throughout early entry, or the complete launch, devoted servers will likely be creatable throughout the recreation choices. Until then, right here’s how to set one up for a gaggle of pals to play in.
Creating a Dedicated Server in Valheim

The first step to creating the server is to purchase the required instruments. Search the SteamCMD, or Steam Console Client, on-line and obtain it. It’s zip file, which implies that its contents want to be extracted. Once the information inside are accessible, open up SteamCMD’s folder and click on on SteamCMD.exe. Doing so will place a number of extra information into the folder, so it could be sensible to create a separate file to preserve the contents for the server in a single place.
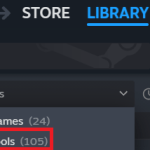
In the SteamCMD.exe window, kind “login nameless” subsequent to the place it says Steam. Doing so prevents the creator from being logged out of their Steam account, so it’s solely wanted the primary time. After it updates, this system will create one other immediate, the place gamers should kind “+app_update 896660” subsequent to Steam. From there, it would obtain the required information to the gadget. Once they’re in, SteamCMD, go to the Steam library and obtain the ‘Valheim Dedicated Server’ that comes with the sport. This has the remainder of the instruments wanted to set up the server.
That folder has all the knowledge wanted to arrange the server, together with mandatory information and a guide To configure the personal server, corresponding to naming it and giving it a password, gamers will want to click on on start_headless_server.bat and edit it. Doing so will pull up a display screen with code pertaining to world data. Players will want to edit the server identify, world identify, and password within the specified areas (which is after identify, world, and password are acknowledged respectively). Once they’re set, open up the ports 2456-2458 on the gadget so different gamers can entry the world. Lastly, click on the beginning.bat file to finalize the method. After a number of minutes of loading, the Valheim world will likely be prepared to discover!
Valheim is in Steam Early Access and is accessible for PC.