Bagisto, the laravel based eCommerce platform can be easily installed on any shared or dedicated hosting. In this article, we will specifically see how to install bagisto on shared hosting.
If you are using dedicated hosting, you may refer to this guide: https://webkul.com/blog/laravel-ecommerce-website
If you are looking to install Bagisto and need a valid hosting provider, you may check our hosting partners here: https://bagisto.com/en/partners/
How to install Bagisto on shared hosting?
On any shared hosting, you can use the Softaculous app to install Bagisto with just a single click. Softaculous is a script library that automates the installation of several open-source web applications.
You may access to Bagisto Softaculous script from here: https://www.softaculous.com/apps/ecommerce/Bagisto
Now, let’s get started with installing bagisto on shared hosting below:
- Once you are on your control panel of the web server (Cpanel or Plesk), you need to find the softaculous application. Usually, Cpanel comes with an installed softaculous application. If you using Plesk, you may check this guide to install the application: https://www.softaculous.com/softaculous/plesk
Below I am using Cpanel as an example: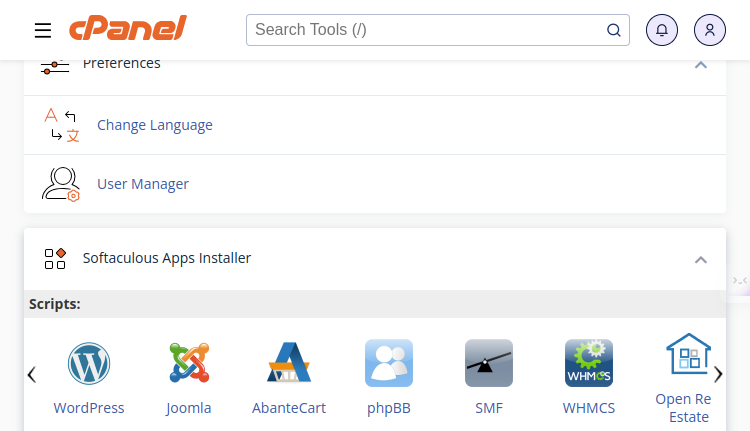
- Once you have got the softaculous application, click on any application listed to open the softaculous panel. Below, let’s click on WordPress. You will get something like the below:

- Next, in the search panel, search for Bagisto.
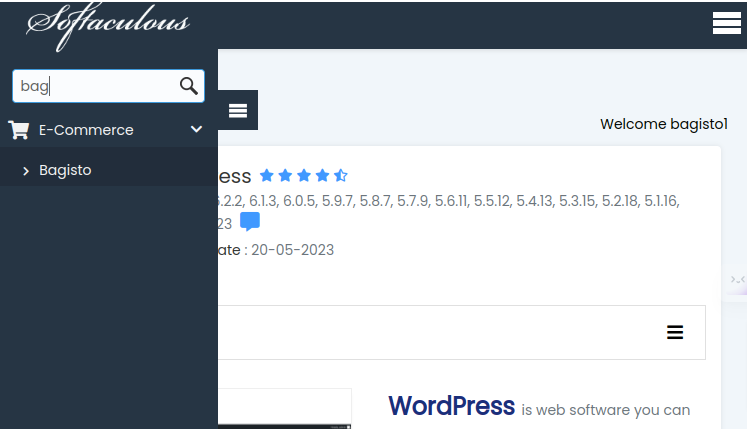
- Once you have got Bagisto as an option, click on that to open the Bagisto softaculous page.
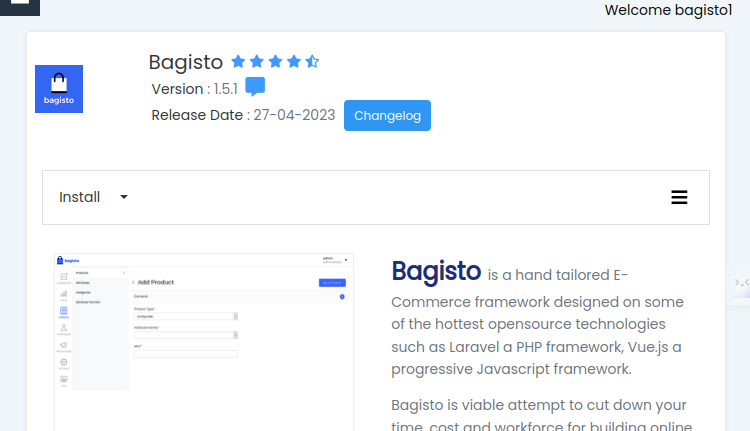
- On the page, you will get the Install option. From there you will get the option to either Quick Install or Custom Install. You may choose any option based on the custom configuration you are looking to do.
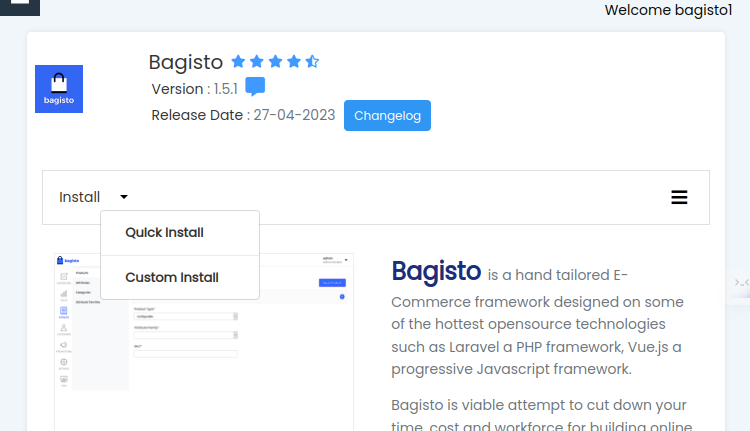
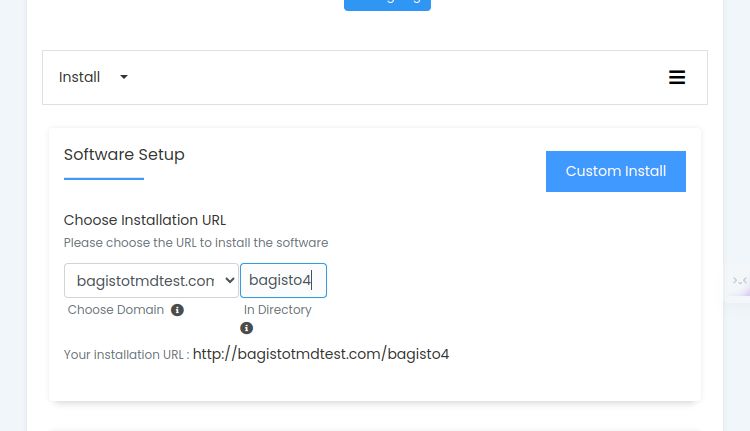
- Let’s go ahead and choose the Custom Install option. In the next step, you will get a page where you will be asked a minimum set of requirements. First, you need to define the directory where you want the application to be installed.
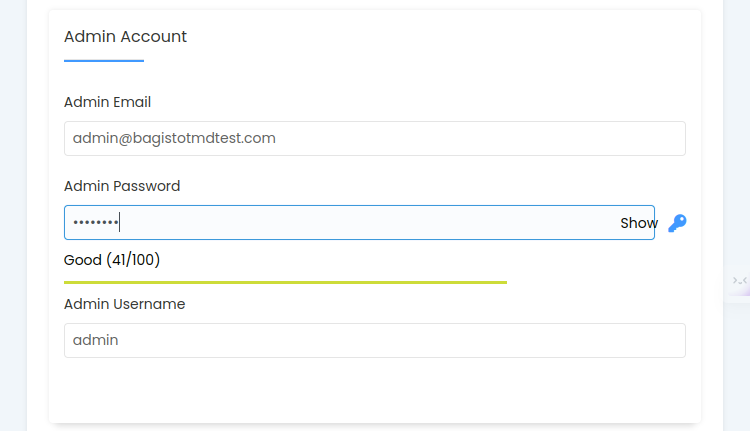
- Going downwards, in the next step you will be asked to set admin credentials like admin email, password and username.
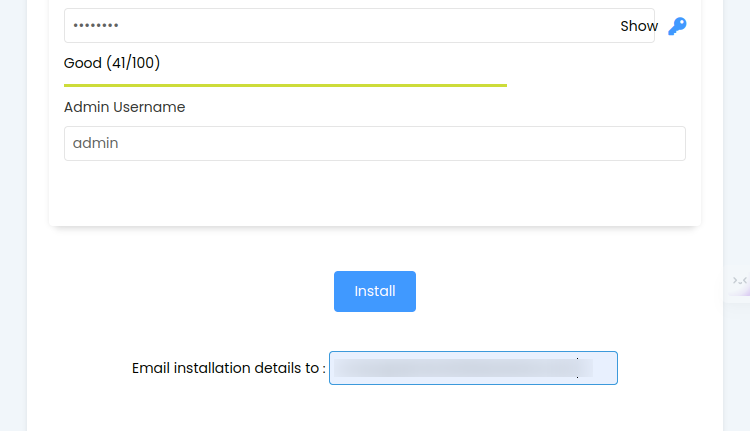
- Once you are done, next all you need to do is to click the Install button to start with the installation. You may also provide an email ID to get details regarding your bagisto setup once the installation has been completed.
- Upon clicking Install, the installation process will start right away and it will take hardly a minute to get the installation done.

- At last, once the installation is completed, you will get to find some basic details regarding the installation in the next window

and also on your email.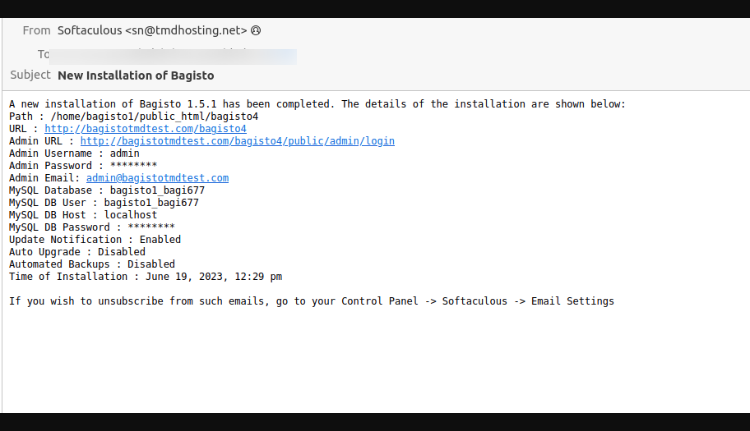
- Upon clicking on the URL, you will find the Bagisto storefront. Voila

So you have seen, how easy it’s to install bagisto on shared hosting. If you have any queries or feedback, do let us know in the comments below. Below you can also go through with the video of installing bagisto on shared hosting.

. . .
https://bagisto.com/how-to-install-bagisto-on-shared-hosting/