Credit: Dominic Bayley
 Credit: Iron Gate Studios
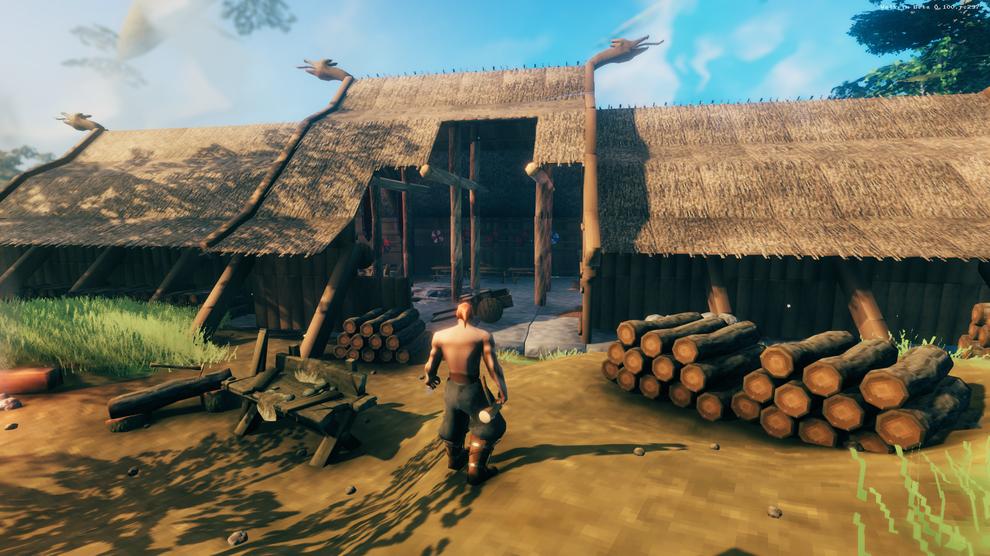
 If you’ve been in search of a fashionable new sport to play on a dedicated local server with associates you want suppose no additional than the thrilling Viking-themed survival sport, Valheim.
Valhiem by developer Iron Gate Studio has actually set Steam alight with its recognition. Since launching into Early Access again in February, two million copies have been bought with tons of and 1000’s of gamers now taking part in it on steam. An enormous boon to Valheim’s recognition is the power to play with up to 10 gamers, the place you may all be a part of collectively to drink tankards of robust Viking mead, construct spectacular bases and battle all method of grizzly Valheim bosses.
 Credit: Iron Gate Studios
 Although extremely addictive, Valheim’s multiplayer could be fairly advanced. For instance, base constructing could be a letdown if you happen to create a masterpiece in a pal’s local server sport and might’t get again in to end it off as a result of they’re offline.
 Credit: Iron Gate Studios
 One answer could be to simply be a part of an present dedicated server however most have been created abroad and intolerably laggy for Aussies to play in. No, what you want is a local Australian dedicated server, with quick pings, minimal lag and loads of carefree Valheim base constructing and boss slaying. Here’s how to do it:
Creating a Valheim dedicated server
1) First, choose the PC you desire to to run your dedicated server on and open Steam.
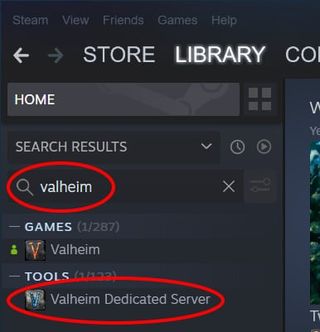
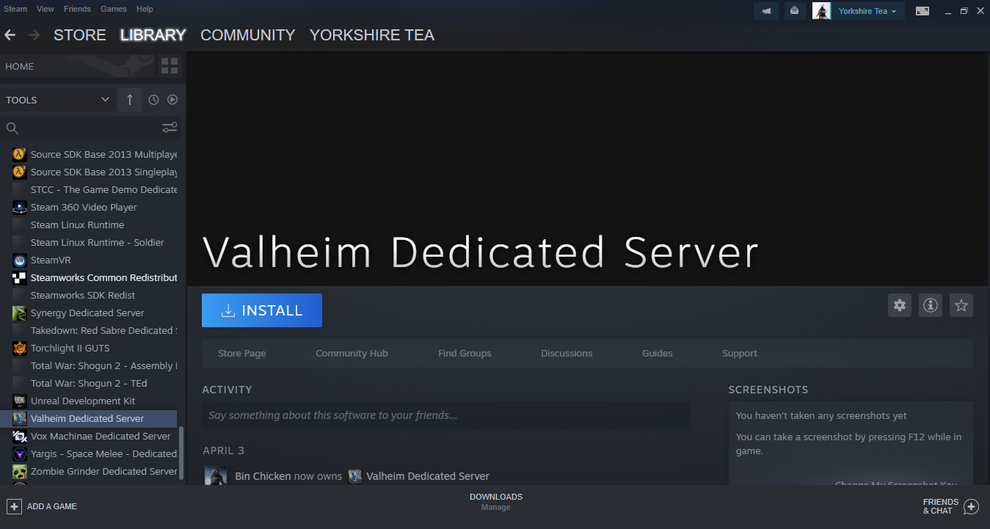
2) You will now want to obtain the Valheim Dedicated Server software. To do that click on on the drop down menu within the high left-hand nook above your video games listing and choose “instruments”. Choose and set up the Valheim Dedicated Server from the instruments listing.
 Credit: Dominic Bayley
 3) You may even want to make certain the right ports are being forwarded to your server by way of your local router and firewall. To do that sort your Gateway IP deal with into your browser to get your router’s settings. Find “Port Forwarding” and open ports 2456-2458. The server’s port will probably be 2456.
 Credit: Dominic Bayley
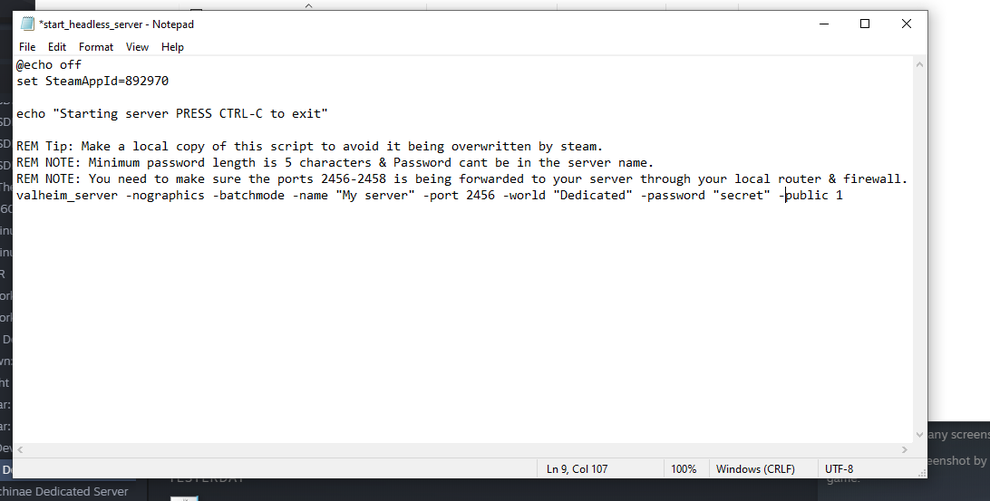
 4) Now, earlier than you launch your dedicated server you will have to do some modifying. In Steam on the Valheim Dedicated Server web page click on the gear icon on the high proper of your Steam window and click on on “handle” then “browse local information”. Now discover the file start_headless_server.bat and make a backup copy of it.
5) Choose a title to your dedicated server. You may need to embody Australia or AU in your title to point out the place it’s from. Now proper click on on start_headless_server.bat within the local information window and choose “edit” to open it in Notepad. Find “My server” and substitute contained in the citation marks with the title you’ve got chosen to your server.
6) Also select a title to your sport. Find the textual content “Dedicated” and write within the title of your sport between the citation marks.
7) Set a password to your server. Do this by inserting your chosen password between the citation marks in “secret”. Remember this phrase, since anyone you invite to be a part of your server will want to use it to get in.
8) In the script file you might also see the textual content -public 1. If you would like your server to be seen in Valheim’s listing of group servers, depart this textual content as it’s. For a personal server, change the “1” to “0”.
9) Save a copy of the start_headless_server.bat now in case something goes fallacious.
10) Your server is now prepared to launch. Launch it by clicking on start_headless_server. If you get a immediate, permit it by way of your firewall. You will know your server is energetic whenever you see “Game server linked.”
It’s play time
If you’ve adopted all these steps rigorously and now have your dedicated server up and operating, congratulations! – now you can get began inviting associates to be a part of.
For fast and easy accessibility to your server add it to your Favorites within the Steam window within the high left of the display screen by clicking “View” after which “Servers” after which the “Favorites” tab and at last “Add server” within the backside proper of the window. You will probably be requested to enter your inside IP deal with, adopted by a colon and the server’s port quantity. Find this by typing “ipconfig” into the Command Prompt.
For your mates to discover your sport and join they may want to use your exterior IP deal with along with the server’s port quantity. You can discover your exterior IP deal with simply in Google by typing “what’s my IP“.
If you want extra assist together with your dedicated server, you may entry the consumer guide in the identical folder that you simply discovered start_headless_server.bat. Otherwise, we suggest posting any additional questions to Iron Gate Studio within the Steam discussions.