

Video Gamer is reader-supported. When you buy through links on our site, we may earn an affiliate commission. Prices subject to change. Learn more
Making a dedicated server for Palworld is a must if you have a large community or want to play with your friends. You can have up to 32 players on the server, and each player can have multiple bases. Setting up a server can be somewhat complicated, which is why we prepared a guide for you. Our guide will cover multiple ways to set up a server, including the cheapest option.
It’s important to note that you’ll have to start over on a new server. Due to this, make sure to check out our Palworld beginner’s guide and choose the best location for your base.
Palworld dedicated server – Fast and easy setup
The easiest way to set up a Palworld dedicated server is by purchasing it from a server provider. Your server will be up and running within a few minutes, but there are also a few downsides. First, you won’t have entire control over your server, which is a big deal for many server administrators. Secondly, an easy installation comes at a cost, meaning that you may have to pay more for these types of servers.
Many different websites offer these services, but our recommendation is Shockbyte. This company offers a budget-friendly Palworld server starting at less than $9 per month. If you want a 32-player server, you’ll have to spend at least $15 a month for an annual plan.
To get started with your Palworld dedicated server, please follow these steps:
- Open Shockbyte
- Go to Palworld
- Select server size (Lamball – 12 players, Grizzbolt – 32 players)
- Click Order Now
- Select your preferences and click on Continue
- Pay for the server
While Shockbyte advertises its Palworld server for only $19.99 for a monthly plan, the truth is that you’ll likely end up paying more. At the moment, the game is not optimized, so you’ll have to upgrade to at least 16 GB of RAM, which costs $36.00 per month. On top of this, you’ll have to spend $10 more to upgrade your CPU.
Renting a Palworld dedicated server through Shockbyte will likely be a great option in the future once Pocket Pair optimizes the game. At the moment, however, even a server with 16 gigabytes of RAM is not good enough, which is why we advise you to take a look at the next step.
How to set up a Palworld dedicated server on Linux
If you play Palworld on a computer, you can easily set up a server through Steam. However, we don’t advise this, as you’ll need to keep your computer running 24/7. On top of this, we don’t recommend playing Palworld on the same computer you use for hosting a dedicated server. Due to this, you’ll need to rent a server and install Palworld’s application on it.
Our step-by-step guide will lead you through the entire process of the setup. Once again, you can choose any server provider you like, from Google to Amazon. However, we recommend Hetzner due to low server costs. You can set up your Palworld dedicated server for as low as $13.50 through this provider, although you’ll need to have some technical knowledge about it.
To start, you’ll first have to rent a server. If you don’t already have a Hetzner account, make sure to make one.
Once you log in to your account, follow these steps:
- Visit the Cloud section and create a new project
- Open the project and click on the Add Server button
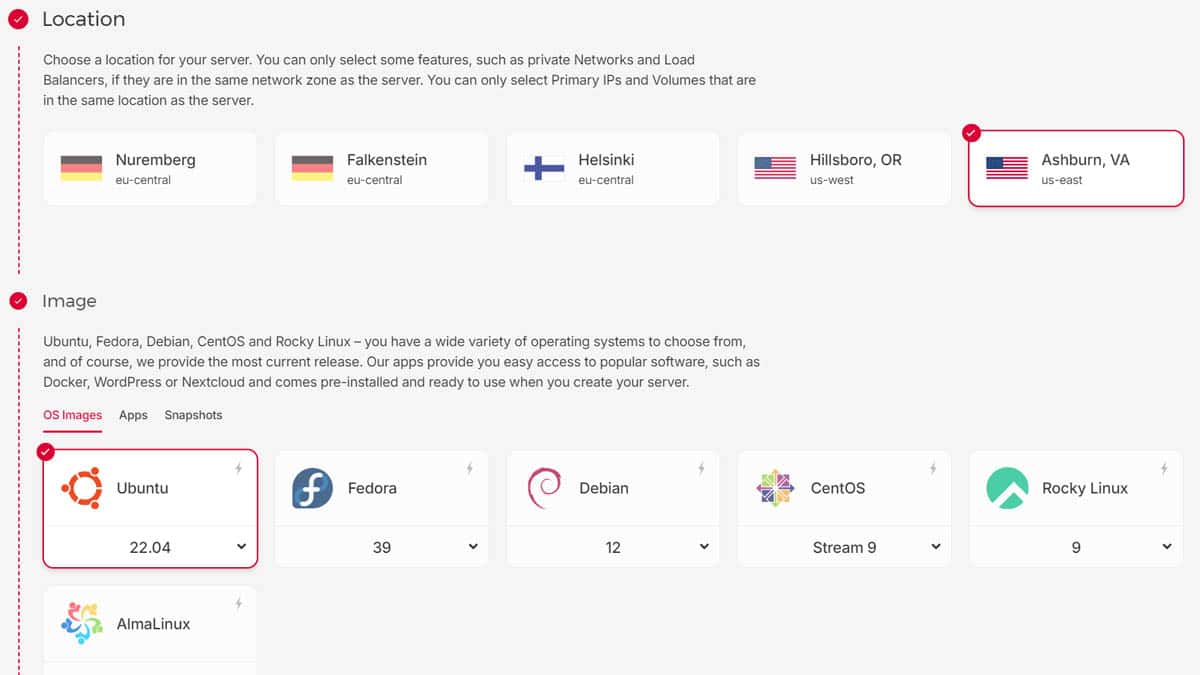
- Choose the location of your server
- Select Ubuntu 22.04 as the Image
- Click on Dedicated vCPU under Type
- Select CCX13
- Click on Create & Buy Now on the right-hand menu
The CCX13 server is the cheapest dedicated server you can use for Palworld. It comes with two virtual CPUs, 8 GB of RAM, 80 GB of SSD storage, and costs just above $13 per hour. This is a slightly better configuration than what Shockbyte offers without any upgrades, yet it’s much cheaper, and you also receive full access to your server.
Linux dedicated server is amazing for Palworld
Running your Palworld dedicated server on a Linux system is a great idea. The only downside is that you won’t be able to install many mods on your server. However, it will be stable, and your users will love it.
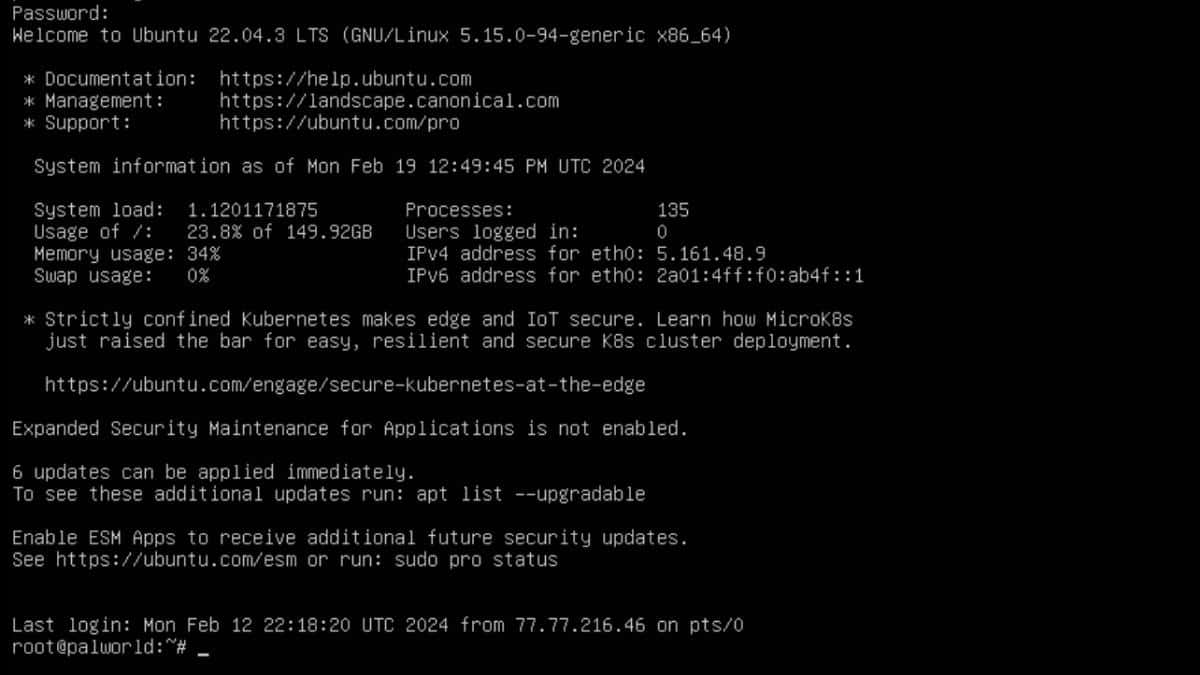
It will take a minute or two for your server to start for the first time, and you will receive root access with a username and password to the email address. Once you receive these details, open the terminal to begin the setup of your Palworld dedicated server. When you open it for the first time, you’ll have to enter your username and password, then you’ll be prompted to change the password right away. After this, you can start installing and configuring your game server.
We recommend you use an SSH client to run commands, such as PuTTY. This free tool will allow you to easily access your server and copy-paste commands.
1) Prepare Ubuntu system for Palworld dedicated server
The first thing you need to do is make sure your operating system is updated with the latest packages. To do this, run the following commands through the terminal:
sudo apt update
sudo apt upgrade -y
When you’re done upgrading the system, you will need to add a new package that will allow you to install the dedicated server. To do this, run this command:
sudo apt install software-properties-common
Finally, you need to add a 32-bit architecture.
sudo dpkg --add-architecture i3862) Install Steam CMD
As you selected a Linux system for your Palworld server, you’ll have to install Steam CMD. This is a command-line version of the popular game launcher, and you need it to download the application for the dedicated server.
First, you will need to add the multiverse depository to your server.
sudo add-apt-repository multiverse
After this, perform another update.
sudo apt update
Finally, use the command to install SteamCMD, which we will use for the rest of the guide.
sudo apt install steamcmd
3) Create a new user for the dedicated server
We don’t recommend you use a root user to run a Palworld dedicated server or any other application on your system. Due to this, you need to create a new user on your system. In this guide, we will create a new user called “steam” with the following command:
sudo useradd -m steamWe will use this username for the rest of our guide. You may change this to a different name, but it won’t make any difference. If you select a different name, however, make sure to change “steam” to your preferred username in every other command we post in this guide.
Once we create a new user, we need to link it to the SteamCMD tool. To do this, open the .bashrc file with your preferred text editor. You can use the following command to do so:
sudo nano /home/steam/.bashrcScroll to the bottom of the file and copy-paste the following:
export PATH="/usr/games/:$PATH"After you make changes to the file, press CTRL+X to exit. You may also need to press the Y button and confirm it with the Return key to apply changes.
Once you save the file, you will be ready to use your new user account. At this point, you need to swap to the new user with this command:
sudo -u steam -sFinally, use the cd (change directory) command to change to the home directory of this new user.
cd ~4) Perform final steps for server installation
After adding all the necessary repositories and creating a new user, it’s time to install another requirement for the Palworld dedicated server. To run the server, you need to install the Steamworks SDK redistributable with the following command:
steamcmd +force_install_dir '/home/steam/Steam/steamapps/common/steamworks' +login anonymous +app_update 1007 +quitOnce this is done, you need to create a directory that will contain the “steamclient.so” file.
mkdir -p /home/steam/.steam/sdk64Finally, you need to copy the file you acquired by installing the Steamworks SDK redistributable. You will put the file in a newly created directory from the previous step.
cp '/home/steam/Steam/steamapps/common/steamworks/linux64/steamclient.so' /home/steam/.steam/sdk64/5) Install the Palworld dedicated server
If you’ve followed all the steps so far and haven’t run into any issues, you will be able to install the Palworld dedicated server. More specifically, you will download a large file from Steam, which will allow you to have your own gaming community in the game.
To begin installing the server, use the command below.
steamcmd +force_install_dir '/home/steam/Steam/steamapps/common/PalServer' +login anonymous +app_update 2394010 validate +quitThis process might take a while, as the dedicated server file is quite big.
6) Run the server
Once you’re done with the installation, you will need to change the installation directory. Again, we will use the cd command, but this time, we will put the entire path to the directory.
cd /home/steam/Steam/steamapps/common/PalServerAt the end, you simply need to use this short command to start the server:
./PalServer.shIf you intend this to be a Community server, use the following command instead:
./PalServer.sh EpicApp=PalServerTo connect to your Palworld dedicated server, all you need to do is launch the game, go to Multiplayer, and enter the IP address of your Hetzner server at the bottom of your screen. Make sure to add :8211 at the end, which is a default port.
If you used the second command to start the server, it will appear on the list of Community servers. This will make it much easier for other players to find it, although you may run into cheaters and hackers while playing the game.
How to change settings on your Palworld server
Whether you play Palworld in a single-player mode or on your own dedicated server, you can change in-game settings. These settings affect the catch rate of Pals, day-and-night cycles, and much more. On top of that, you need to change these settings to configure the name of your server, admin password, and many other options.
Pocket Pair provides default Palworld settings that you need to copy to your installation directory and change. To do this, use the following command:
cp /home/steam/Steam/steamapps/common/PalServer/DefaultPalWorldSettings.ini /home/steam/Steam/steamapps/common/PalServer/Pal/Saved/Config/LinuxServer/PalWorldSettings.iniAfter using the command, you need to edit a configuration file. We will provide you with a command you can use to do so, although we recommend you use an FTP client, such as FileZilla, to access and edit your files more easily.
nano ~/Steam/steamapps/common/PalServer/Pal/Saved/Config/LinuxServer/PalWorldSettings.iniEditing this file will allow you to fine-tune your Palworld dedicated server. Feel free to play with different settings and discuss different options with your community. We advise you to increase the XP rate in the beginning, allowing players to easily catch up with their single-player progress.
Since you will be the owner of the server, you need to set up its password. To do so, find the following and replace it with your password.
ServerPassword=""To set a password for your Palworld server, you simply need to put it between the quotation marks and save the file. You can activate admin commands by typing in /AdminPassword [yourpassword] in the game chat. For the full list of commands, please visit our guide for Palworld admin controls and console commands.
Run your server at the system boot
Palworld is a poorly optimized game, which makes sense considering it’s in early access. Unfortunately, this means that your dedicated server will likely crash from time to time. As you will not always be online to run it again, we advise you to make it run whenever your system boots. On top of this, the server will restart itself whenever it crashes.
If you are still using the steam user, use the exit command to go back to the root user.
exitAfter this, you need to create a new file that tells the system to start and restart your Palworld dedicated server. To do this, either use an FTP client or the following command:
sudo nano /etc/systemd/system/palworld.serviceThe file should be blank, and you need to copy-paste the following code into it.
[Unit]
Description=Palworld Server
Wants=network-online.target
After=network-online.target

[Service]
User=steam
Group=steam
WorkingDirectory=/home/steam/
ExecStartPre=/usr/games/steamcmd +force_install_dir '/home/steam/Steam/steamapps/common/PalServer' +login anonymous +app_update 2394010 +quit
ExecStart=/home/steam/Steam/steamapps/common/PalServer/PalServer.sh -useperfthreads -NoAsyncLoadingThread -UseMultithreadForDS > /dev/null
Restart=always

[Install]
WantedBy=multi-user.target
During this process, you will add a few more arguments, such as -useperfthreads, which will make your server run faster. Furthermore, your Palworld dedicated server will automatically check the game version before running and automatically update if necessary, and the restart command will help keep the server online 24/7.
Once you add these lines to the file, save it with CTRL+X and exit. This file will also create a new service on your Linux system, and you’ll need to start it.
sudo systemctl start palworldIf this command doesn’t work, that’s because the Palworld server is already running. Therefore, there is no need to start it.
Finally, we want this service to start whenever we boot the system, so we’ll use a slightly different command for this.
sudo systemctl enable palworldPalworld dedicated server – FAQ
How can I make my own dedicated server for Palworld?
Our guide above explains detailed steps you need to take to install a Palworld dedicated server. However, you can also use services that automatically set this up for you, although you’ll end up paying more without having full control over your server.
My Palworld server keeps crashing, why is that?
If your server keeps crashing, you likely run out of memory to run it. Unfortunately, the video game is not optimized, which is why it requires a vast amount of resources. If these crashes occur every few hours, try to upgrade to at least 16 GB of RAM. At this stage of the game, we recommend having at least 32 gigabytes if you intend to have more than 10 concurrent players on your server.
How can I ban cheaters from Palworld?
To keep your server clean, you will need to use the /BanPlayer command, followed by the player’s Steam ID. To use this command, you will first have to use the /AdminPassword command.
https://www.videogamer.com/guides/palworld-dedicated-server-guide/


