Want to know how to set up a dedicated server in Palworld? Palworld is a vast playground of survival, crafting, and monster battling fun, and you may be wondering how to enjoy catching Pals with your real-life pals. What if you want a dedicated server that only a select few can join?
At the moment, making sense of Palworld dedicated servers can be a head-scratching process. Luckily, we’ve got an easy-to-follow guide to walk you through the process, which involves opening up the game’s files, editing a few lines, and possibly resorting to workarounds if you encounter an error message along the way. Read on for the full details on setting up a dedicated server in Palworld.
Palworld | Early Access Launch Trailer | Pocketpair
How to set up a Palworld dedicated server
There are several easily accessible multiplayer servers available for Palworld shenanigans with your friends, but Palworld dedicated servers allow up to 32 people to play together on their own private version of the Palpagos Islands. They’re worth the effort it takes to create them, even if it’s a bit of a complex process.
Keep in mind that only the Steam version of Palworld currently supports the option to set up a dedicated server. If you’re playing on Game Pass, you’re currently out of luck, at least until an update comes along.
To set up a dedicated server, follow these steps:
- Find your IPv4 address. You can do this easily by opening Command Prompt in Windows, typing “ipconfig,” and taking note of the info there.
- Install Palworld from Steam and run the game at least once.
- Install Palworld Dedicated Server, which will appear in your Steam Library as long as you’ve installed Palworld. Note that you may need to enable Tools from Steam’s dropdown Library menu if you don’t see it.
- Right click on Palworld Dedicated Server, click Browse Local Files, and then open PalServer. If all goes well, you should see the following message: Setting breakpad minidump AppID, followed by a random string of unique numbers.
- Go back to the Palworld local files and open DefaultPalWorldSettings. There’s a lot of information here, but all you really need to do is copy everything below the third line, beginning with [/Script/Pal.PalGameWorldSettings].
- Go back to the Palworld local files and click through to the following: Pal>Saved>Config>WindowsServer.
- Open PalWorldSettings. It should be empty. Now, paste the text you just copied in there. You can adjust the following values:
- ServerName: The name of your server.
- ServerDescription: A short description of your server, if you want one.
- AdminPassword: The password that you’ll need to access Admin commands within your server.
- ServerPassword: Anyone who joins your server will need to enter this password.
- PublicIP: Put your IPv4 address here.
- When you’ve finished editing PalWorldSettings, save and close it.
- Your dedicated server is now set up. Next, launch Palworld Dedicated Server from Steam. A menu will pop up with the following options:
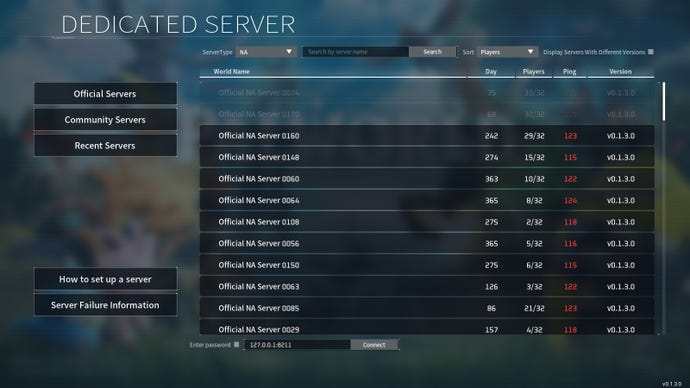
- Play Palworld Dedicated Server: This makes your server private. Anyone who wants to join needs to input your IPv4 address and port number (by default, it’s 8211) in the box at the bottom of the Palworld multiplayer lobby. We recommend choosing this option.
- Open and start as a community server:This makes your server appear as one of the listed servers in the Palworld multiplayer lobby. At the moment, many Palworld players are reporting that they aren’t able to see their server listed even after selecting this option, so be wary. We’ll detail this error further below.
- Once you’ve chosen your preferred option, a command prompt window will open. Keep this window open and launch Palworld through Steam. You’ll need to have both the Palworld game and this command prompt open at all times when you’re playing on your own dedicated server.
- Select “Join Multiplayer Game” in the menu. If you decided to make your server private, you and anyone who joins need to enter the appropriate IP info at the bottom of the screen. If you decided upon a community server, you should see your server in the community server list.
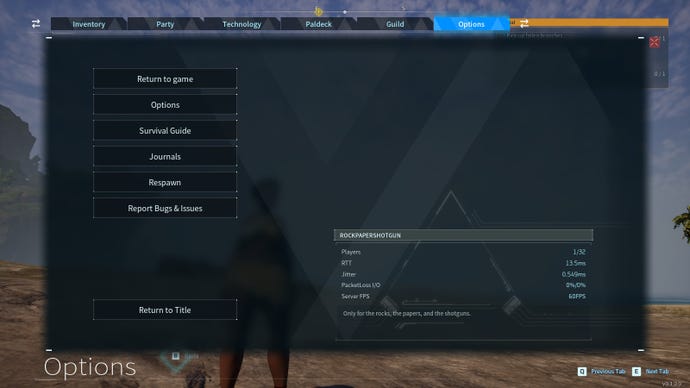
- If all went well, you’re now ready to start playing! Whenever you want to check info on your server, including its description and FPS, hit the Esc key and bring up your settings.
Palworld dedicated server troubleshooting
Setting up a dedicated server in Palworld is a wonky experience at the moment, and many players are currently unable to see their server in the community servers list. Others receive an error message reading “No password has been entered” when trying to connect to a password-protected server. Here’s how to get around those issues.
If you can’t see your server in the community servers list
If you correctly set up your server, it should be listed in the Palworld section for Battle Metrics, a third-party website that tracks servers for online games. If it’s there, the correct IPv4 address and port number you’ll need to connect will also be listed. We recommend sharing this information with whoever you want to join your server and having them input it manually – at least until Palworld releases an update to fix this error.
If you’re hit with a “No password has been entered” error
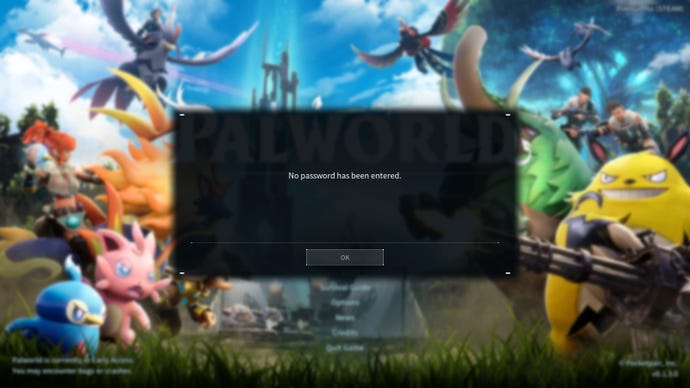
There’s a quick – if unorthodox – fix for this. In the multiplayer game menu, go to the Community Servers list and then attempt to join any server which has a lock on it. This causes a password box to appear. Input the password for the server you’re trying to join, and when the option to join the server appears, select “No.” Now, input the correct IPv4 address and port number in the box at the bottom of your screen and try to connect. Viola – you’ll be able to join the correct server you were intending to. It’s an odd fix…but for now, it works.
Hopefully now you know everything you’ve ever wanted to know about multiplayer options and dedicated servers in Palworld. If you want to get started cataloguing Pals for your friends on your own server, head over to our complete list of all Pals in Palworld. We’ve also got a guide to the best starter Pals and a list of tips and tricks to ensure that your multiplayer adventures are as smooth as possible.
https://www.rockpapershotgun.com/palworld-how-to-set-up-a-dedicated-server

