

How do you set up a dedicated server for Valheim? Valheim took the survival game area by storm upon its launch, breaking new concurrent player records each few days for fairly a while. With the recent release of the Hearth & Home update, gamers who fell for this sudden phenomenon earlier within the yr are returning en masse to try what’s new. A number of the attraction comes down to how simply you’ll be able to set up your individual Valheim dedicated server and play along with your folks.
This Valheim dedicated server internet hosting walkthrough will clarify how to flip your present world into a dedicated server, how to port-forward and permit ports by way of your firewall, how to make your self admin, and how your folks can be a part of your recreation as soon as it is set up.
On this web page:
How to set up a Valheim dedicated server
To set up a Valheim dedicated server, here is what you want to do:
Download and set up the Valheim Dedicated Server software on Steam (you may have it if in case you have Valheim). Right-click the software in your Steam library and go to “Manage -> Browse Local Files”.
In the window that seems, discover the file named “start_headless_server”, make a backup of it, after which open it up. Find the road that begins with “valheim_server” and alter the next components (every contained in the quotes):
- “-name”: enter a title on your server.
- “-world”: enter a title on your world that does not include phrases from the server title. If you are utilizing a earlier world, enter that world’s title.
- “-password”: enter a password that does not include phrases from both of the above.
Now save and exit the file.
How to flip your present world into a dedicated server
To flip your present Valheim world into a dedicated server, there are a couple of additional steps to take firstly of the setup course of.
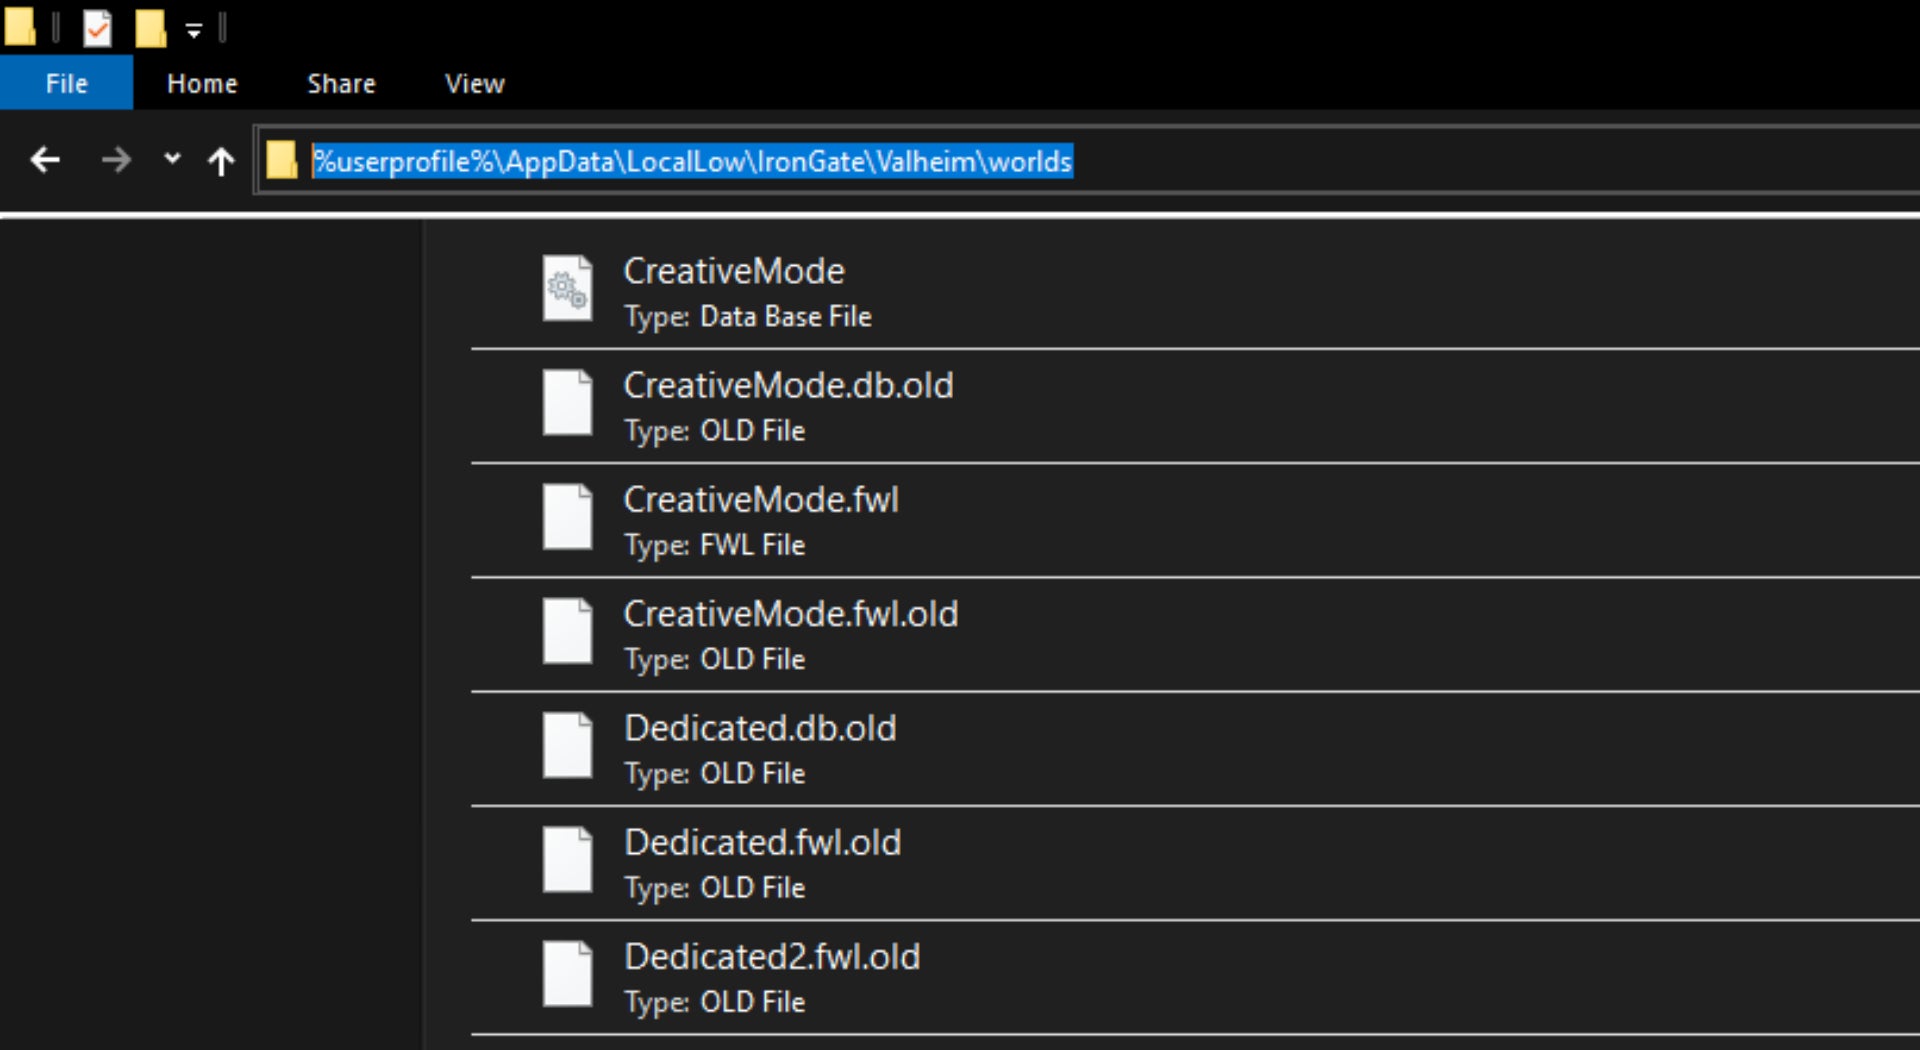
Open up Windows Explorer and kind “%userprofilepercentappdatalocallowirongatevalheim” (with out the quotes) into the search field.
In the worlds folder you may see a number of information for every of your worlds. Make a word of the precise title of the world you would like to use on your dedicated server, since you’ll want to enter that title precisely subsequent to the “-world” tag within the above part.
If you are going to run the server on a totally different machine, then you definitely want to copy all the information associated to your required world, and paste it into the identical worlds folder on that machine.
Valheim Port-Forwarding and IP Address defined
In order for gamers who aren’t in your individual home to begin enjoying in your dedicated server, you want to do two extra issues:
- Log into your router account and set up Port Forwarding for ports 2456-2458.
- Allow ports 2456-2458 by way of your machine’s Firewall.
Here’s how to set up Port Forwarding:
- Find out your default gateway IP Address. If you do not know it, hit Start+R, kind “cmd” and hit Enter. Then within the window that seems, kind in “ipconfig” and hit Enter. Next to “Default Gateway” is the IP Address you want. For most individuals it’s “192.168.0.1” or “192.168.1.1”.
- Open up a browser window and kind on this IP deal with, then hit Enter to carry up your router software.
- Login to your router after which set up Port Forwarding for the ports 2456-2458, for each TCP and UDP. The course of will depend on your router so make sure to search on-line for how to port-forward in your particular community and router kind.

Here’s how to let these ports by way of your Firewall:
- Hit Start+R and kind in “wf.msc”, then hit Enter to carry up your Firewall Advanced Settings.
- Click on “Inbound Rules”, then right-click it and choose “New Rule”.
- Select “Port”, then “TCP”, and kind within the particular native ports “2456-2458”. Select “Allow the Connection”, maintain all of the bins on the following display screen ticked, and provides the rule a title and click on Finish.
- Repeat the method to set up one other rule for a similar ports, however this time utilizing “UDP” as an alternative of “TCP”.
Now you’ll be able to run the Valheim Dedicated Server software. Wait till a message seems within the console that claims “Game Server Connected”. You and your folks can now be a part of the server.
“I can not run the Dedicated Server software!”
If you are working the server on a totally different machine than you are enjoying the sport on, then do not run the software by way of Steam itself. Just discover that “start_headless_server” file once more and double-click it to run the server. This means you will not run into points with Steam pondering you are working two video games directly on the identical account. I’d recommend creating a shortcut for that file in your desktop for simple entry.
How to be a part of a Valheim dedicated server
To be a part of a Valheim dedicated server, choose the character you would like to use, after which underneath the “Join Game” tab, choose “Join IP”, after which kind within the IP Address and the Port, separated by a colon. For instance: “192.168.0.99:2456”.
Be conscious: if you happen to’re on the identical community (i.e. in the identical home) because the server, you want to use the precise inside IP Address of that machine; and if you happen to’re distant, then you definitely’ll want to use the exterior IP Address.
To discover out your inside IP Address, follow the steps above for locating out your default gateway deal with, however this time use the IP Address subsequent to “IPv4 Address”.
To discover out your exterior IP Address, simply go to What Is My IP Address and use the deal with it prints for you.

How to make your self admin in your dedicated server
You will not give you the option to use Valheim console commands and cheats on a dedicated server till you make your self admin. To make your self (or one other participant) admin, here is what to do:
While logged into the server, hit F2 and make a word of your participant ID quantity. It’s a lengthy quantity subsequent to your participant title. Then give up the sport and cease the server.
Open up Windows Explorer and kind “%userprofilepercentappdatalocallowirongatevalheim” (with out the quotes) into the search field. Then edit the “adminlist” textual content file and paste in your participant ID quantity onto a new line. Then save and give up.
Now begin the server again up and login. You ought to now give you the option to use console instructions like “save” to force-save your game, and so forth.
Why set up a Valheim dedicated server?
There are a few explanation why you might have considered trying to set up a Valheim dedicated server. The primary attraction is that if you happen to’re working a dedicated server, you will not have to invite your folks each time you set it up, and your folks can be a part of the sport and play even when you your self will not be enjoying Valheim.
You may maintain the server working for so long as the machine you are working it on stays energetic. Time is paused when no gamers are on the server, so that you needn’t fear about time passing and your builds getting destroyed whereas nobody is on-line.
Another massive good thing about setting up a dedicated server for Valheim is you can host the server on one machine and play on one other machine, quite than having one machine do all of the work (although you too can run the dedicated server and play on the identical machine if you want).
How to play Valheim multiplayer with out a dedicated server
If you do not need or want to hassle with setting up a dedicated server and also you simply need to play a informal Valheim recreation along with your Steam buddies, that is very straightforward to do:
Select your character in-game, after which choose the world you would like to open up to multiplayer. Select “Start Server” to make it a multiplayer recreation. You can both simply begin from time to time invite your folks by way of the Steam overlay (right-click their title and choose “Invite to Lobby”, or you may make the world a neighborhood server.
To make the world a neighborhood server, you may want to tick each “Start Server” and “Community Server”, after which add a password in order that solely your folks can be a part of. Once the server is up your folks ought to give you the option to discover your server underneath the “Join Game” tab by filtering to present buddies solely.
And that is all the things there may be to learn about setting up a Valheim dedicated server in a single web page. We hope you discovered all the things you wanted right here. Now why not take a take a look at our take a look at whether or not you have to be running Valheim using Vulkan for additional efficiency advantages?
https://information.google.com/__i/rss/rd/articles/CBMidGh0dHBzOi8vd3d3LnJvY2twYXBlcnNob3RndW4uY29tL3ZhbGhlaW0tZGVkaWNhdGVkLXNlcnZlci1ob3N0aW5nLWhvdy10by1zZXR1cC1kZWRpY2F0ZWQtc2VydmVyLXRvLXBsYXktd2l0aC1mcmllbmRz0gEA?oc=5


