
Let me make a prediction — you obtain far too many emails every day, have bother responding to them but nonetheless examine for brand new mail consistently, and are inundated with unsolicited emails that distract you from the extra necessary messages. If this rings true for you, you aren’t alone. The average U.S. worker receives 120 emails every day and solely responds to 1 / 4 of them. Roughly 20% of received emails are unwanted “graymail” that’s in a position to get previous anti-spam and safety filters and land in customers’ inboxes. We waste quite a bit of time coping with email, 28% of our day: that is almost three hours per day. And all predictions point out these issues will proceed to develop.
Feeling overwhelmed by my rising email depend, I adopted a easy strategy to lowering the quantity of email I would like to cope with day-after-day, growing my capacity to preserve my inbox smaller and bettering my capacity to cope with the really necessary messages. Let me share this strategy with you within the hopes you can also reap the identical advantages.
Leveraging the highly effective guidelines engines of cloud-based email providers, I solely enable emails from domains and senders who I do know to land in my inbox. All different email is shipped to a separate folder which I can examine occasionally (learn: weekly) and cope with in bulk in a short time. This means for me, for the previous yr, over 16,000 emails have skipped my inbox. Yup, 16,000.
Below are the steps to put this method in place to handle your inbox. The steps are particular to
Office 365
; nonetheless, the opposite large email suppliers all assist related steps.
Steps to handle your inbox
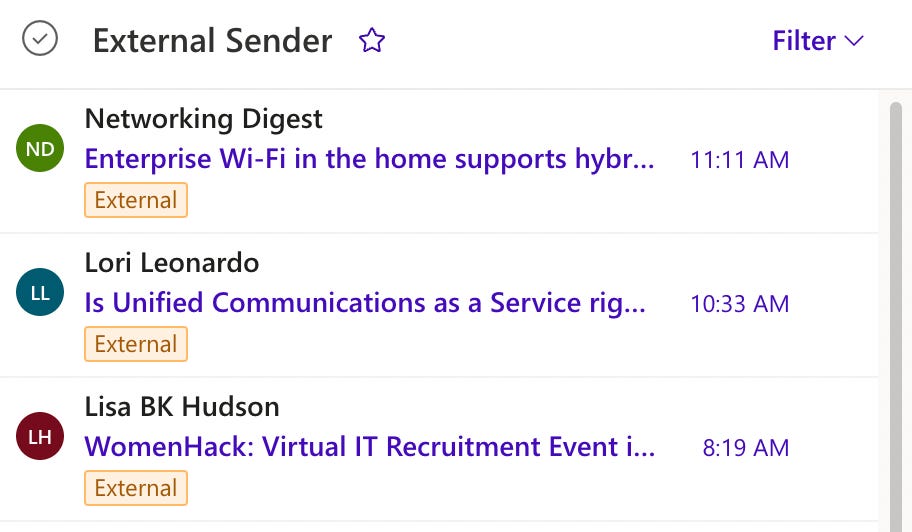
1. First, create a brand new folder. I referred to as mine “External Sender.” This would be the folder that email will likely be despatched to if it doesn’t meet the principles we put in place. You can see a screenshot of my folder beneath which exhibits that I presently have 26 emails on this folder.

James LaPlaine
2. Next let’s arrange our preliminary rule. Click on the gear within the higher proper to open the settings panel.
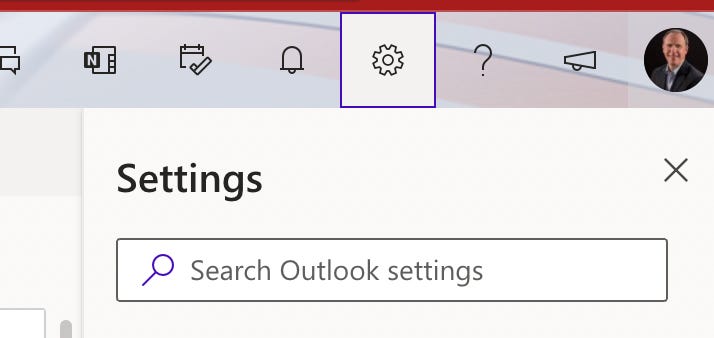
3. At the underside of this panel you will note the phrases “View all Outlook settings.” We’ll want to click on that to get to the principles setup.

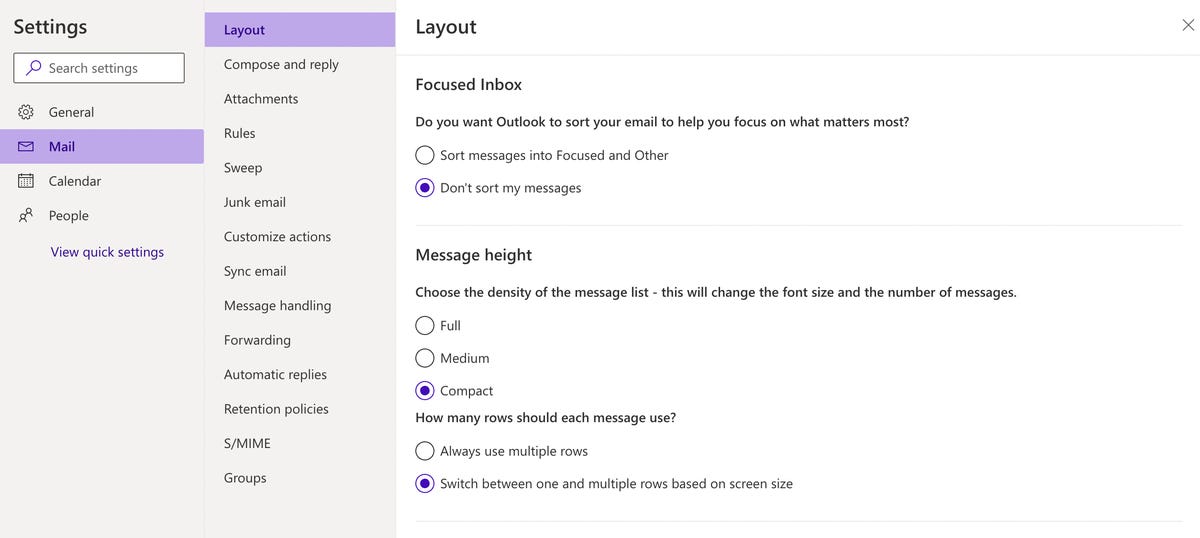
4. This will convey up a brand new window, as proven beneath. Select the 4th entry in that window, “Rules.”
5. This will convey up the record of any current guidelines you have already got in place. There could also be none proven in the mean time. We’re going to create a brand new rule, so let’s click on “+ Add new rule” close to the highest.

6. Call the brand new rule “External Senders”.
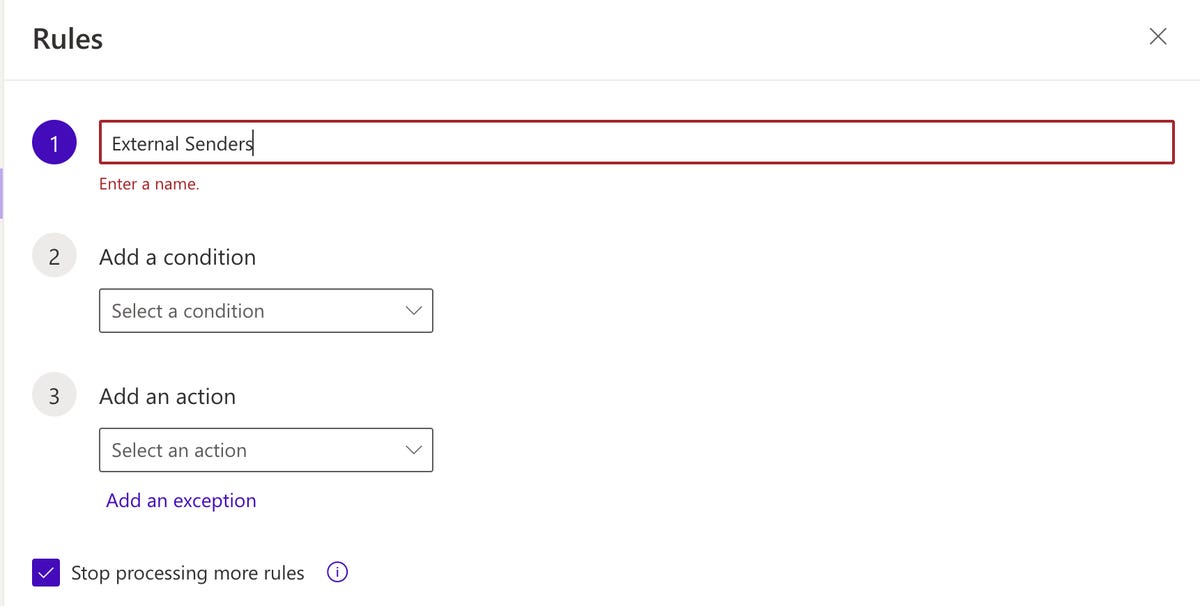
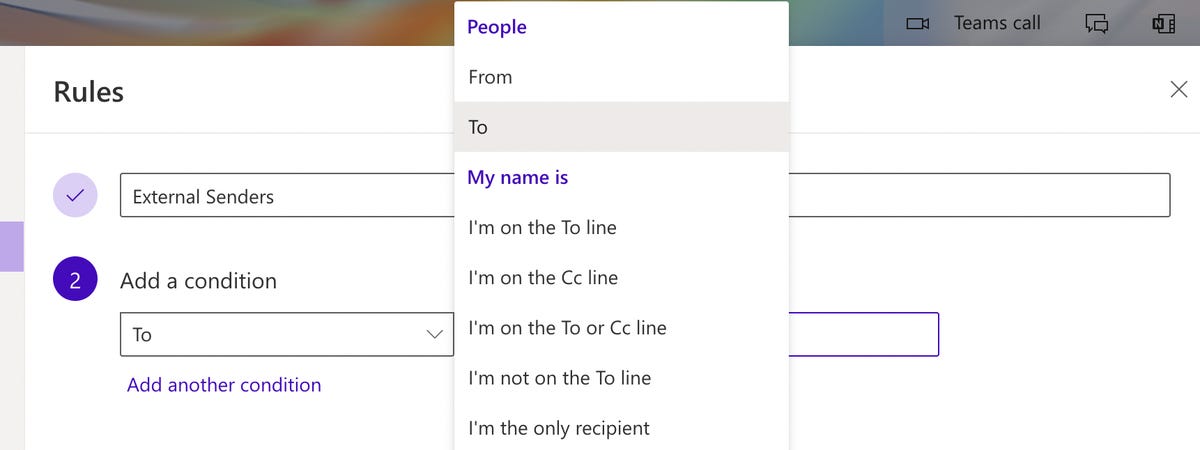
7. Then use the “Add a situation” choice field to select “To” underneath the People part close to the highest.
8. You’ll enter your email tackle within the field to the precise, simply as I’ve proven beneath. This rule will apply to all emails which can be despatched “To:” you.

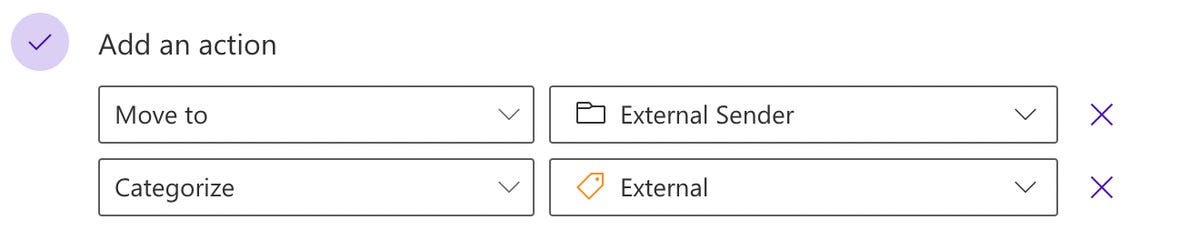
9. Now let’s add a pair of actions. First Choose the “Move to” choice after which choose the folder you created, “External Sender”. Then add one other motion, deciding on “Categorize”, choose “New Category” within the field to the precise, and create an “External” class. In my case, I selected to additionally coloration code this orange. Your configuration ought to look one thing like this.
10. We’ve now created a rule for all email that’s despatched to us to get moved to the “External Sender” folder and to mark every email with a transparent indicator. However, we want to do another necessary step, which is to create an exception to our rule. This is the place the magic occurs, as we are going to create a listing of all of the domains and email addresses we wish to keep in our inbox.
Click the “Add an exception” hyperlink.

11. In the field to the precise enter any domains and email addresses that you need to stay in your inbox. For instance, you may record zdnet.com so that each one emails from this area make your inbox. You may record particular person email addresses as nicely. Below is a small pattern from my rule.

12. Once you have entered your preliminary record of exceptions you merely save the rule and now all emails despatched instantly to you should have this rule utilized to it. If the email isn’t in your exceptions record it is going to be tagged and moved to your “External Sender” folder.
Tuning
I discovered that when I had the rule in place I had missed a number of legitimate domains and email addresses that have been now touchdown within the “External Sender” folder. I merely edited my rule and added new exceptions to forestall this from occurring sooner or later. You can, of course, transfer any email from your “External Sender” folder to your inbox your self. You’ll discover when doing in order that the class tag will stay with the message. I discover this immensely useful as a visible information when coping with email addresses that I need to reply to that don’t meet the standards of touchdown instantly in my inbox.
You ought to scan your “External Sender” folder usually initially to guarantee you have not filtered an email incorrectly till you’ve gotten tuned your rule to deal with your on a regular basis interactions appropriately. I discovered this course of to be pretty short-lived and as we speak I’ve excessive confidence that what does not make it to my inbox isn’t price coping with all through the day.
A pair of instances every week I open the “External Sender” folder and shortly scan by means of the record to see what may be necessary. If I discover an exception I can replace my rule, in any other case, I delete the lot of them all of sudden.
Email nirvana achieved.
See additionally:
https://www.zdnet.com/article/take-back-control-of-your-inbox/


![Top 6 Server Management Software and Tools Compared [2023]](https://ta-relay-public-files-prod.s3.us-east-2.amazonaws.com/icp/product_images/23db1d70048ad120d46c9ea0e43f22e5.png)
