

Adobe Marketo is a marketing automation software acquired by Adobe in 2018. It helps businesses automate marketing tasks, measure engagement, and manage leads. Features include email marketing, analytics, landing page creation, social media engagement, and CRM integration. It’s widely used by medium to large businesses to enhance marketing efforts and boost sales conversions.
The SPF record specifies which mail servers and domains are permitted to send email on your domain’s behalf. Conversely, the DKIM record is a distinct DNS TXT entry that houses the public key, enabling receiving mail servers to validate a message’s signature. Both are email authentication techniques ensuring ISPs and email services that the senders have the genuine authority to dispatch emails from a specific domain, confirming the legitimacy of your email server when sending from your domain.
The process of configuring SPF:
1. Login to your DNS management console
2. Navigate to Tools & Settings > DNS Template
3. You need to edit the DNS TXT record related to SPF
An SPF TXT record for Adobe Marketo will have the following syntax:
[yourdomain.com] TXT v=spf1 include:mktomail.com -all
Screenshot below will show you an example of the SPF record. We’ll be using CloudFlare for this example.
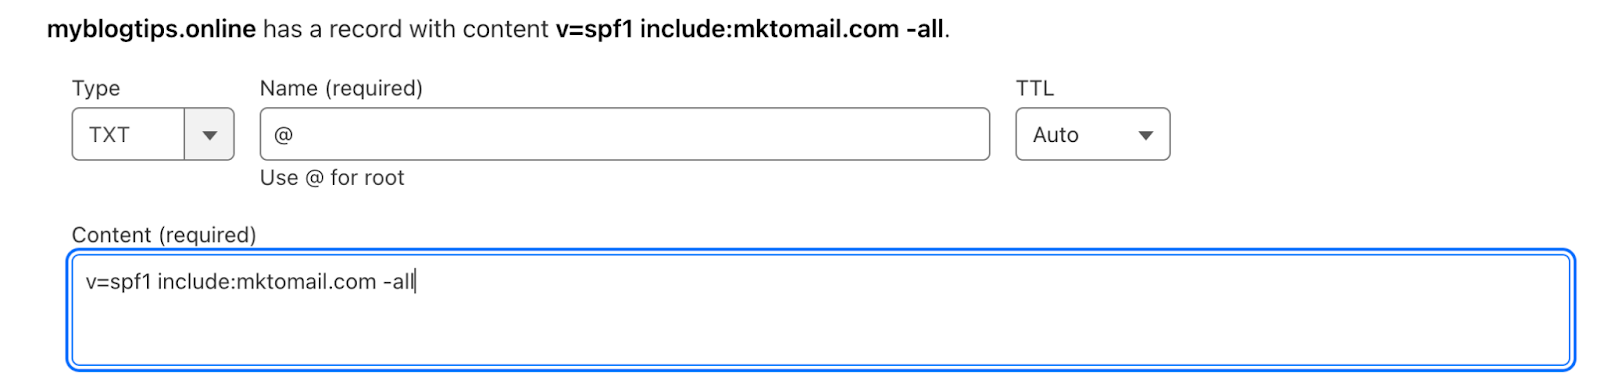
Important Note: Each domain must have only one SPF TXT Record. If you have multiple SPF Records, SPF will return a PermError.
If you are using multiple IPs, ESPs, and Third-Party services for your various email strategies, you should include them in a single SPF Record.
E.g v=spf1 ip4:18.57.156.221 include:mktomail.com include:thirdpartyservice.com ~all
The process of configuring DKIM:
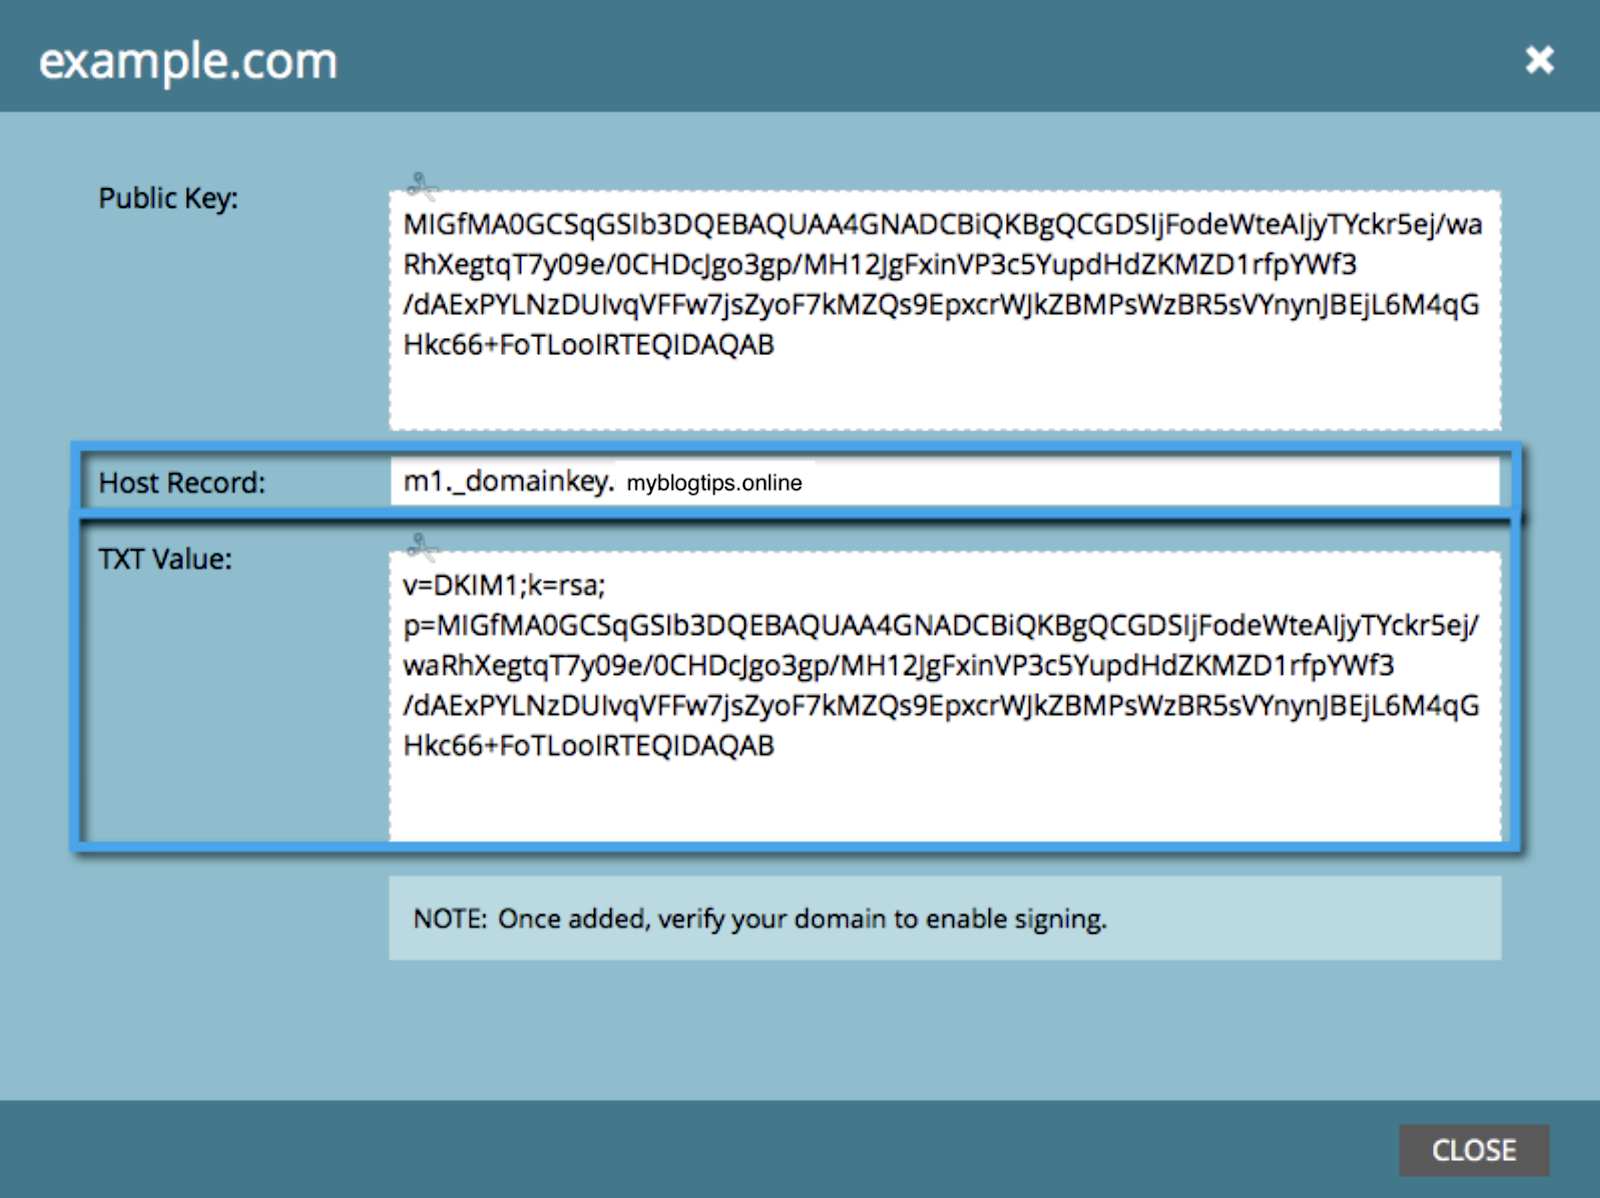
You can personalize the DKIM signature to reflect the domain(s) of your choice. Here’s how:
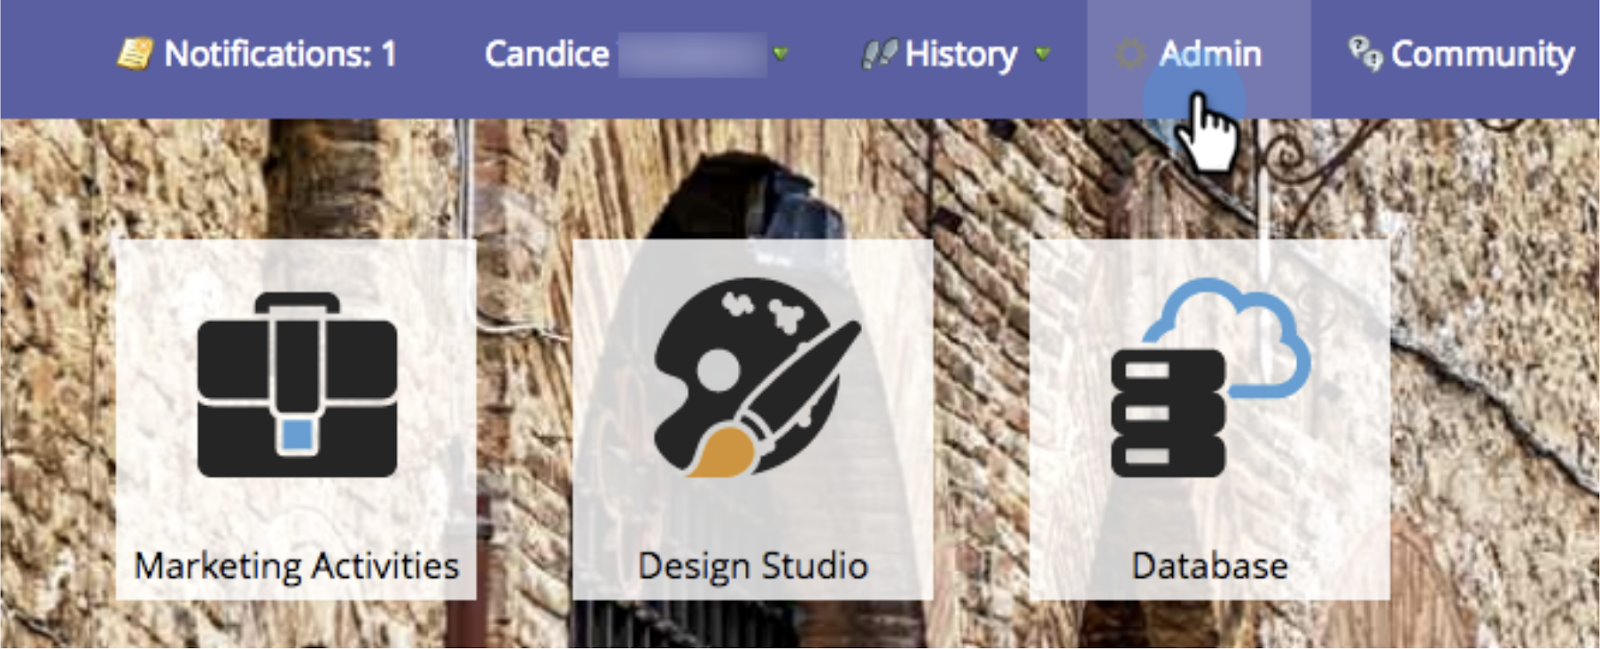
- Go to the Admin section

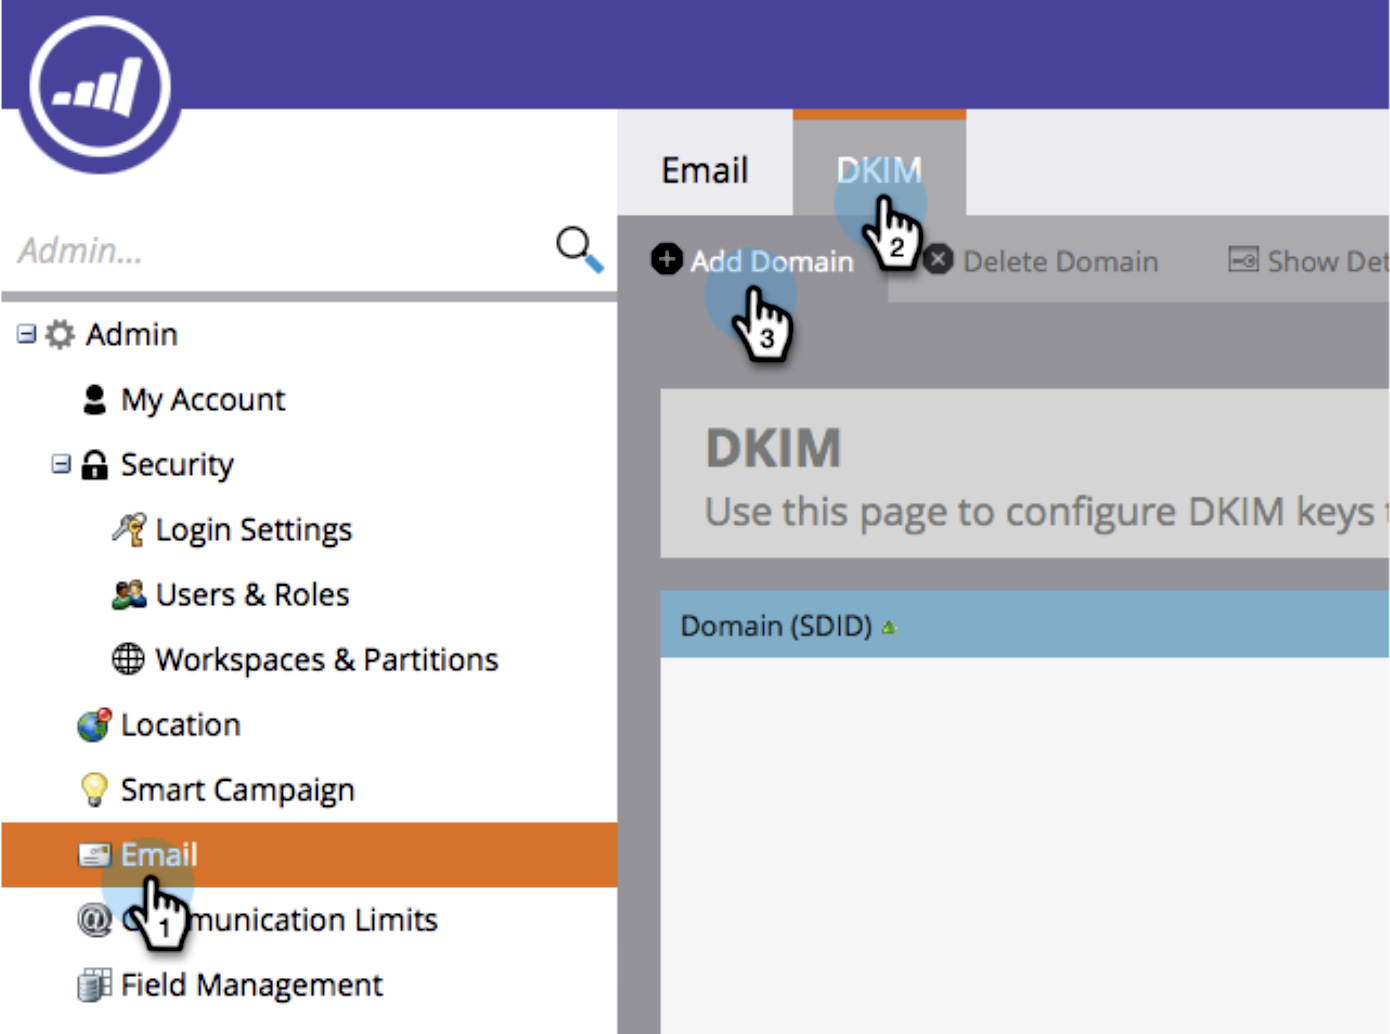
- Click on Email, then the DKIM tab, and finally Add Domain.
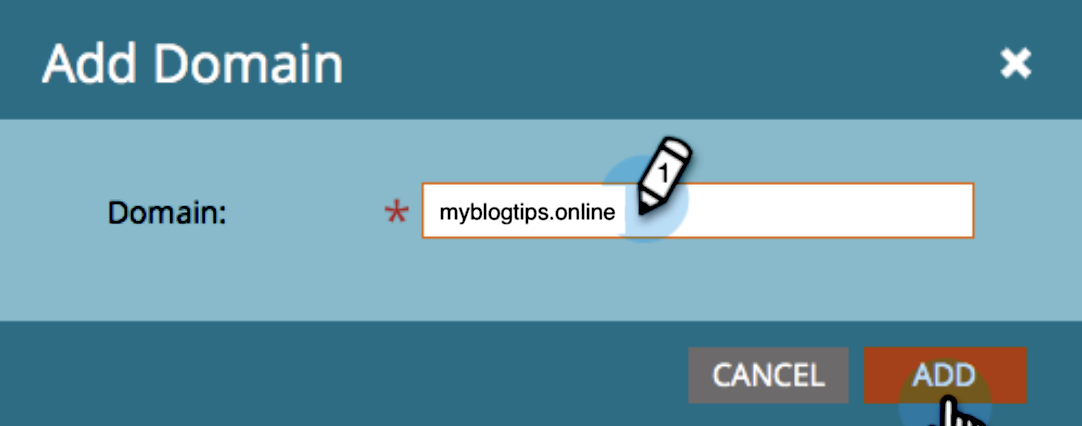
- Enter the domain you will be using in Marketo emails as the From Address and click Add.

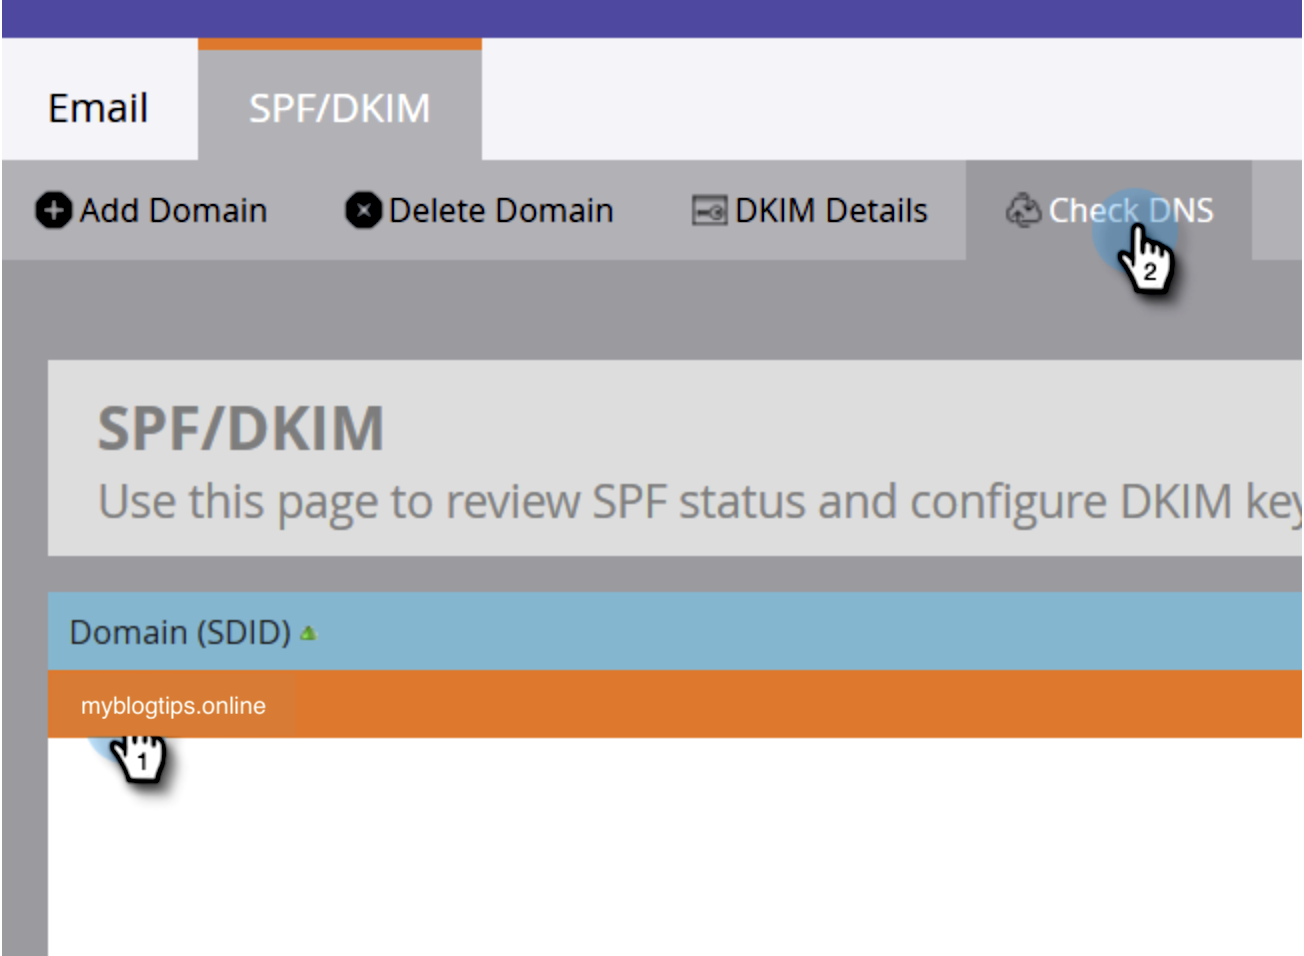
- Copy the obtained Host and TXT Value to your DNS Zone. In this example, we’ll be using Cloudflare

- Once they confirm they’ve created the record, come back to Marketo, select your domain, and click Check DNS.
Note: If the configuration fails and you have created the record correctly, it may be a matter of a DNS propagation.
Congratulations you have fully configured the SPF and DKIM for Adobe Marketo.
The post Configuration of SPF and DKIM for Adobe Marketo appeared first on EasyDMARC.
*** This is a Security Bloggers Network syndicated blog from EasyDMARC authored by EasyDmarc. Read the original post at: https://easydmarc.com/blog/configuration-of-spf-and-dkim-for-adobe-marketo/
https://securityboulevard.com/2023/11/configuration-of-spf-and-dkim-for-adobe-marketo/?utm_source=sbwebsite&utm_medium=marquee&utm_campaign=marquee


 with Email Verification on NTA")


