To set up your own dedicated server for Re.Poly, follow these instructions:
Install SteamCMD
- Begin by downloading SteamCMD.
- Create a folder where you will install SteamCMD and the game.
- Unpack the steamcmd.zip file into the folder.
- Launch steamcmd.exe and wait for the installation process to complete.
If you need assistance with the installation, refer to the SteamCMD Wiki for a detailed step-by-step tutorial.
Download Re.Poly Server
- Log in using the command “login anonymous” within SteamCMD.
- Wait for the login process to finish.
- Once logged in, enter the command “app_update 1189160 validate” to download the server files for Re.Poly.
- Wait until you see the message “Success! App ‘1189160’ fully installed.”
- Close SteamCMD by typing “exit”.
First-time Installation of Re.Poly Server
- Navigate to the Re.Poly Server folder. You can find it in the SteamCMD folder: steamapps -> common -> Re.Poly Server.
- Open the “ServerStart.bat” file and wait for it to finish loading.
- The loading process is complete when no further actions occur in the window.
- Close the window by pressing CTRL+C. At this point, the server has loaded all the necessary files.
To allow your friends to connect to your server, you need to add your IP address to the “ServerStart.bat” file. To edit the file, right-click on it and select “Edit”.
The start parameter in the file should look like this:
start RePolyServer.exe "AspiraWorld?listen?ip=[your ip]?QueryPort=27015?Port=7777" -server -log
Replace “[your ip]” with your IPv4 address, which you can find at the top of the page of any IP detector websites.
Save the changes to the file and close the editor.
Network Status Check Windows
Let us now verify whether the network configuration on the server PC is set to public or private.
NOTE: These instructions specifically apply to Windows operating system. Please note that I cannot provide information on how to perform these steps on Linux or MacOS, as I have not tested them.
Start by clicking on the Start menu, then navigate to the Settings (represented by a gear icon) and select Network & Internet.
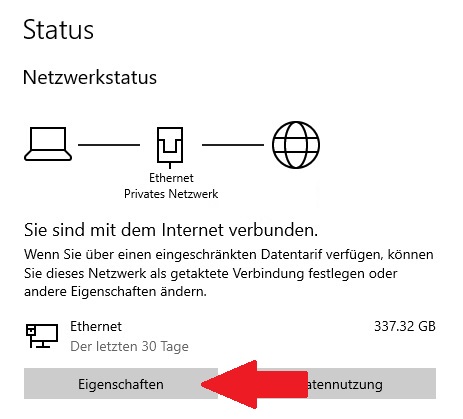
Look for the network connector and check if it displays “Private Network” in the center at the top. If it does, then you have successfully completed the process.
If the network connector does not display “Private Network,” click on Properties to proceed with changing it.
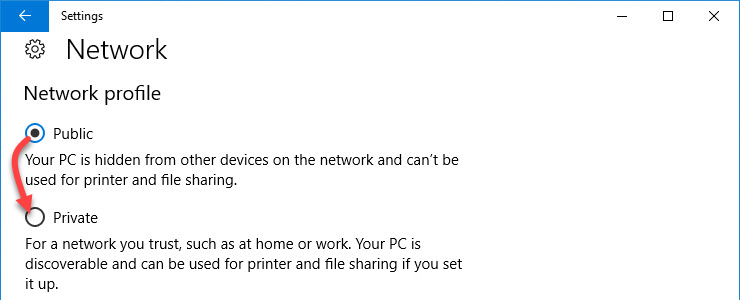
Change the network settings from public to private, and once you have done so, you’re finished.
Port Forwarding Windows Firewall
Now, let’s proceed with configuring port forwarding for the firewall.
Press the Windows key again and type in “Windows Defender Firewall with Advanced Security” to open the corresponding application. Left-click on “Inbound Rules” within the app.
NOTE: The following step-by-step instructions need to be repeated for the following two ports:
Click on “New Rule…” located on the right side of the window. In the new window, select the option for port, then click “Next.” Choose TCP or UDP, depending on the protocol, and enter one of the specified ports (e.g., TCP 27015) under the “Specific local ports” field. Proceed by clicking “Next.”
Select “Allow the connection” and click “Next.” Choose the appropriate network profile (domain/private/public) where the port forwarding should be active. Make sure to include the necessary hacks or additional configurations if required. Click “Next.”
Assign a meaningful name for better orientation (e.g., Re.Poly TCP27015 or Re.Poly TCP7777). You may optionally enter a description in the designated field but it is not mandatory. Once done, click “Finish” to complete the process.
Port forwarding router
Let’s consider an example of port forwarding using a Fritzbox 7430 router. Please note that these steps may differ for other router models, so make sure to consult the documentation or support resources specific to your router.
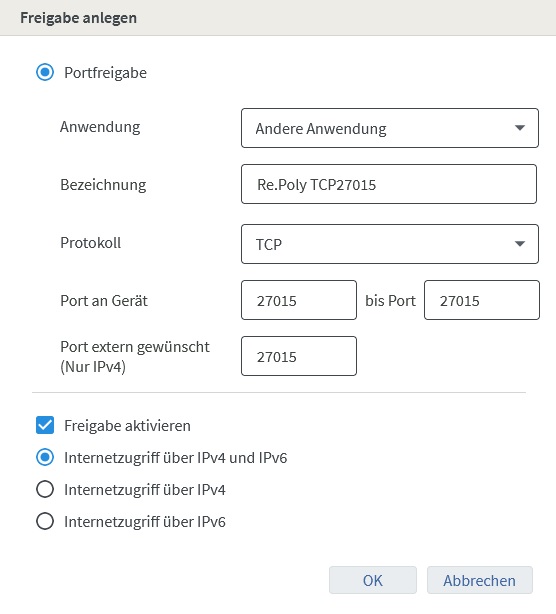
The required ports for forwarding are as follows: TCP 27015, TCP 7777, UDP 27015 for both IPv4 and IPv6.
To begin, open your web browser and enter “fritz.box” in the address bar. Log in to the router using your access credentials, which can usually be found on a sticker in the manual or on the bottom of the router.
Once logged in, navigate to the “Internet” section and select “Permit Access.” In the Port Sharing tab, locate the option to “Add device for sharing” in the lower area.
Choose your PC, where the server is running, as the device to share. If you are unsure about the PC name, you can press the Windows key and type “Info” to open the System Information app. The system name corresponds to the PC name.
Scroll down a bit and click on “New Share” located in the bottom right corner.
Following these steps, the window should resemble the following example:
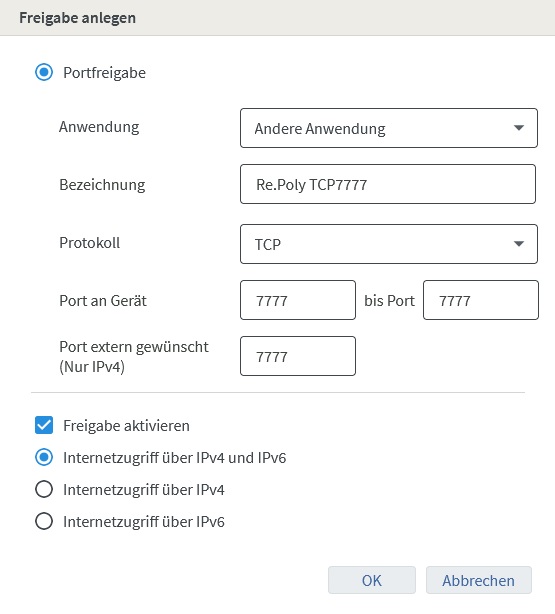
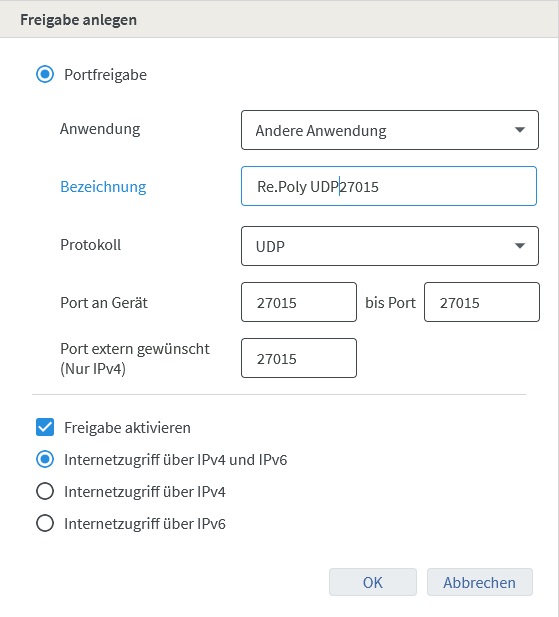
Once you have made the necessary configurations, click on “OK” in the lower area of the window. Then proceed to click on “Apply” in the overview section. Please note that the page loading time may vary depending on your router, so be patient.
After successfully releasing the ports, the server should now be accessible to others.
Configure the Re.Poly Server
Now, let’s proceed with the personal configuration of the server, including the server name, passwords, player slots, and other settings.
Begin by navigating to the RePoly/Saved/Config/WindowsServer folder. Locate the Game.ini file in this folder, right-click on it, and select “Edit.” Make sure to save the changes made to the Game.ini file once you have finished configuring the desired settings.
Within the opened file, enter the following configurations:
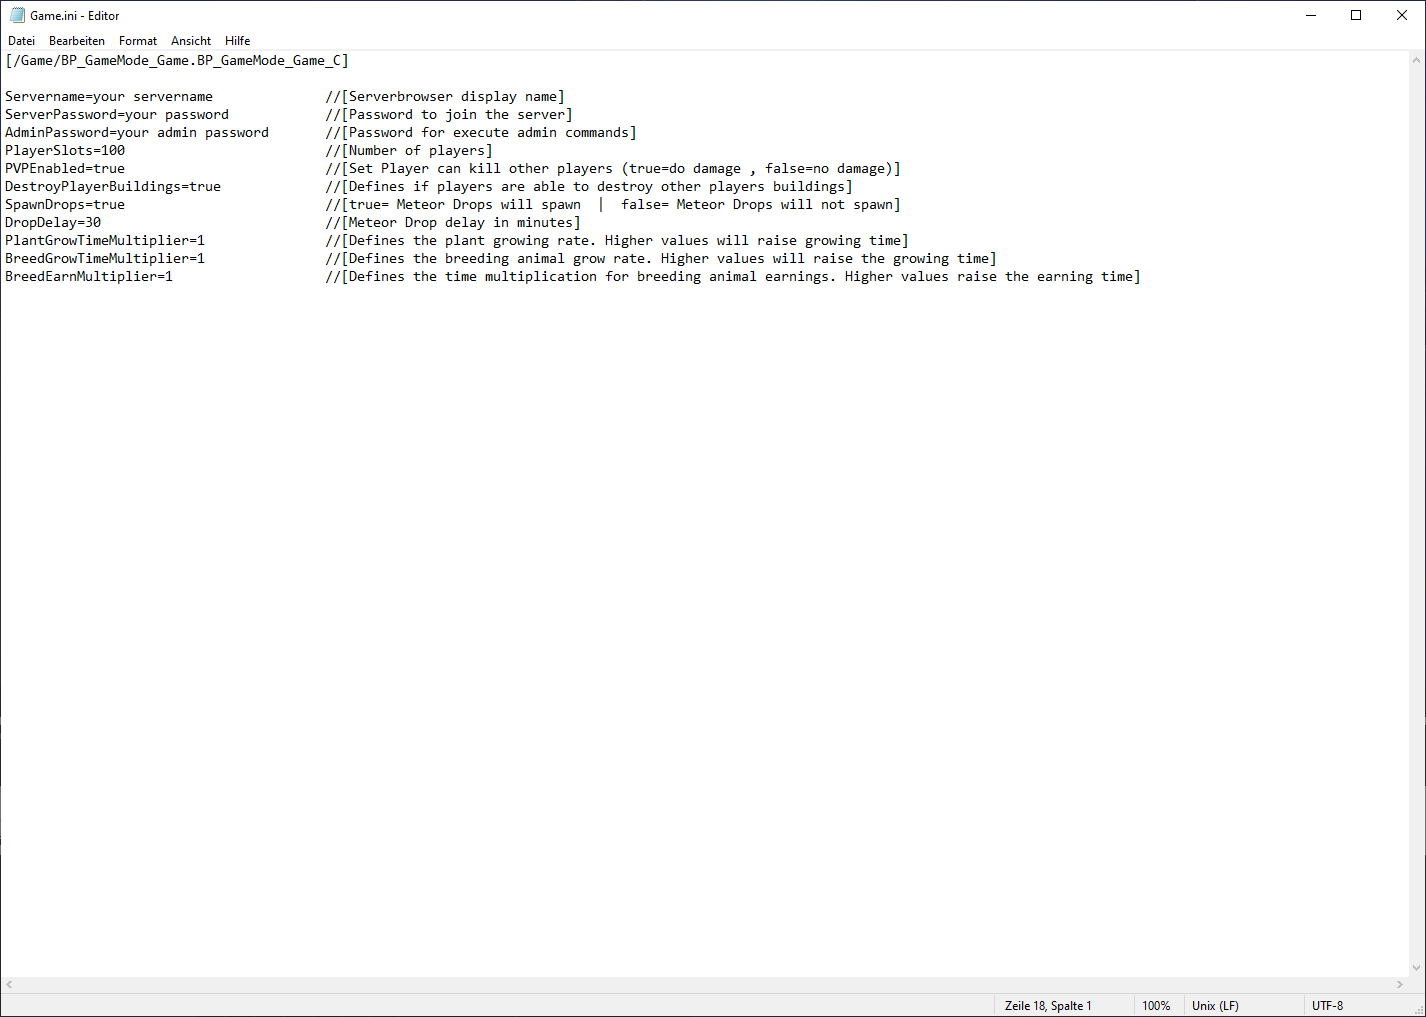
Please note the following important information regarding the entries:
- Everything after “//[… does not come with entries! The text is for descriptive purposes only and must be removed.”
- It is essential to exercise caution when modifying the settings. Extreme values for the number of players, DropDelay, and multipliers can potentially lead to a server crash.
Once you have made the desired configurations, simply save the Game.ini file. To start the server, double-click on “ServerStart.bat.”
https://www.gamenguides.com/how-to-setup-a-dedicated-server-for-re-poly