V Rising is a vampiric lore-based recreation during which your fundamental focus is building your castle and buying the perfect tools like armor and weapons. The recreation additionally has considerably of a forex within the type of Blood Essence. While Greater Blood Essence is its superior type.
You may also purchase servants within the recreation who will do your bidding. Also, like each survival-focused recreation, you’ll require an inventory of things like cotton, leather, silver ore, and so forth.
This information will probably be discussing V Rising server settings and the best way to arrange your customized server. If you’ve already tried organising servers of video games earlier than, then the server settings received’t be an issue for you.
However, if it’s your first time then our information will cowl all fundamentals of organising a V Rising server in depth. If for some motive you’ve any sort of error together with your server then discuss with the V Rising server errors answer error repair information.
Three Server Configurations in V Rising

First, if you wish to get pleasure from V Rising with your pals then you’ll require a devoted V Rising server. Now, there are three attainable methods to arrange a devoted V Rising server. Some methods are free to make use of whereas others require you to pay a minor price. The three primary choices to arrange a V Rising server are:
- Renting a server via G Portal
- Using Steam itself
- Using Steam CMD
Renting A Server Through G Portal (Paid)
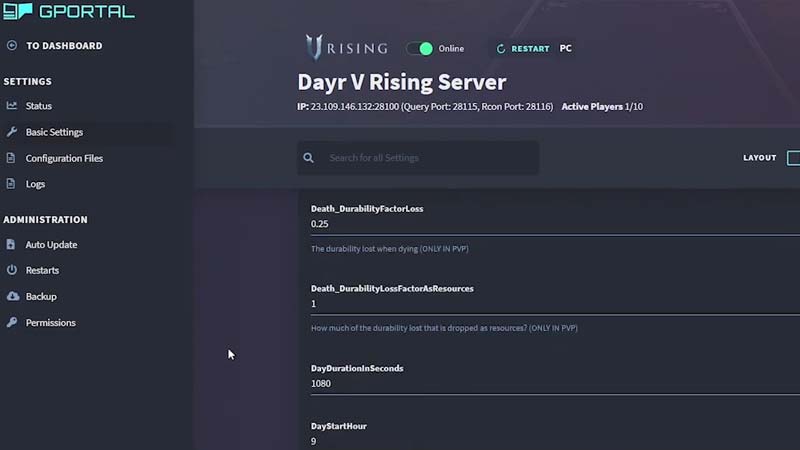
Using G Portal to arrange your server has its execs and cons. The execs are that it’s the identical factor that V Rising makes use of to run its official server. And that G Portal offers you a hassle-free, easy-to-use, and high-performing server expertise. But like all issues, execs have to be balanced with cons. But on this case, there is just one con. That is, you must pay to make use of G Portal to lease servers.
However, G Portal could be very simple to make use of. All you must do is go to the official web site of G Portal and head to the V Rising server web page. Next, simply choose the server possibility that fits your wants. Also, you possibly can configure your server via an possibility in G Portal.
Setting Up A Server Through Steam (Free)
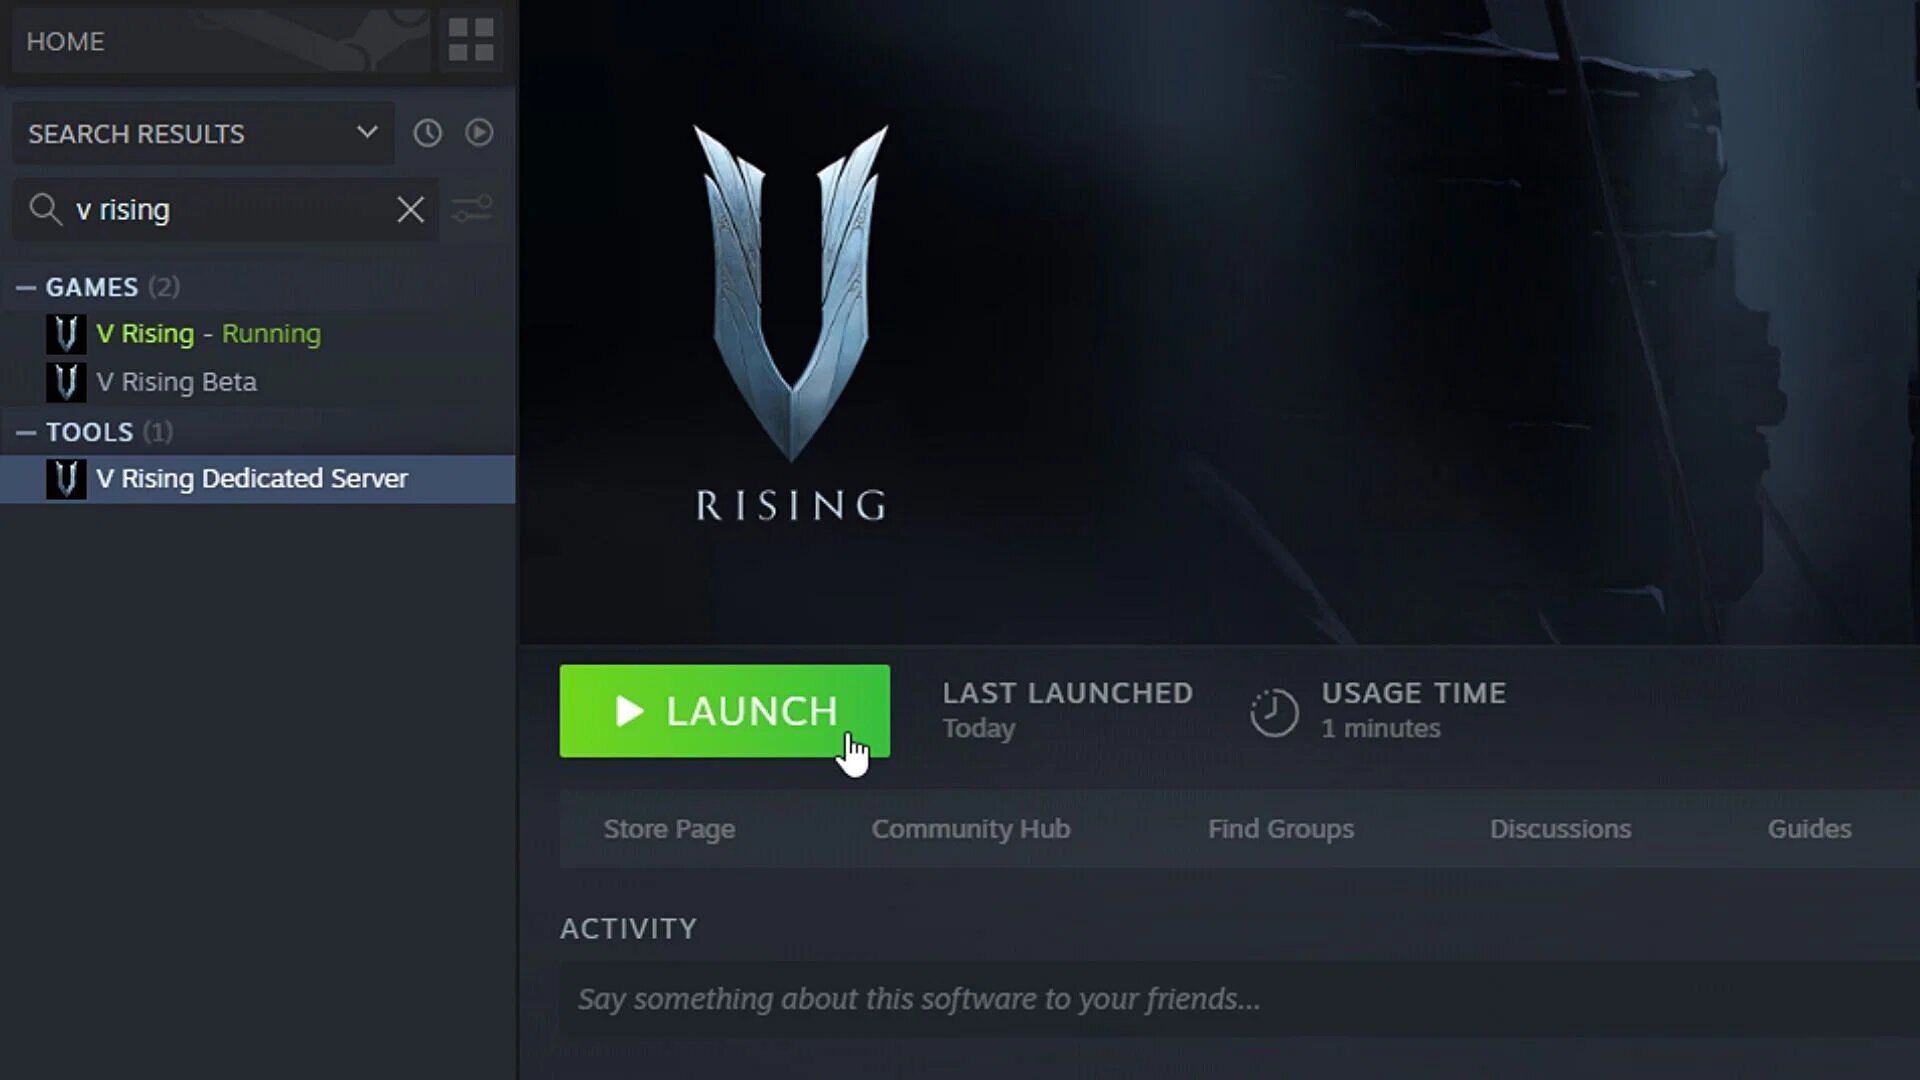
Here is one other approach to arrange your devoted V Rising Server and this time it’s via Steam itself. First, go open your steam library and kind “V Rising Dedicated Server”. Next, set up it. Now right-click the app and choose “handle” after which “browse native recordsdata”.
This takes you to your server recordsdata. After that, you must observe the Server Settings in V Rising that we’ll talk about intimately later.
Setting Up A Server Through Steam CMD (Free)
Usually, steam gamers use Steam CMD to arrange their devoted servers in varied video games. The identical technique additionally works for V Rising devoted servers. If you want to arrange your devoted server via Steam CMD then observe our steps.
- First of all, you’ll want to obtain Steam CMD.
- Then extract the zip file.
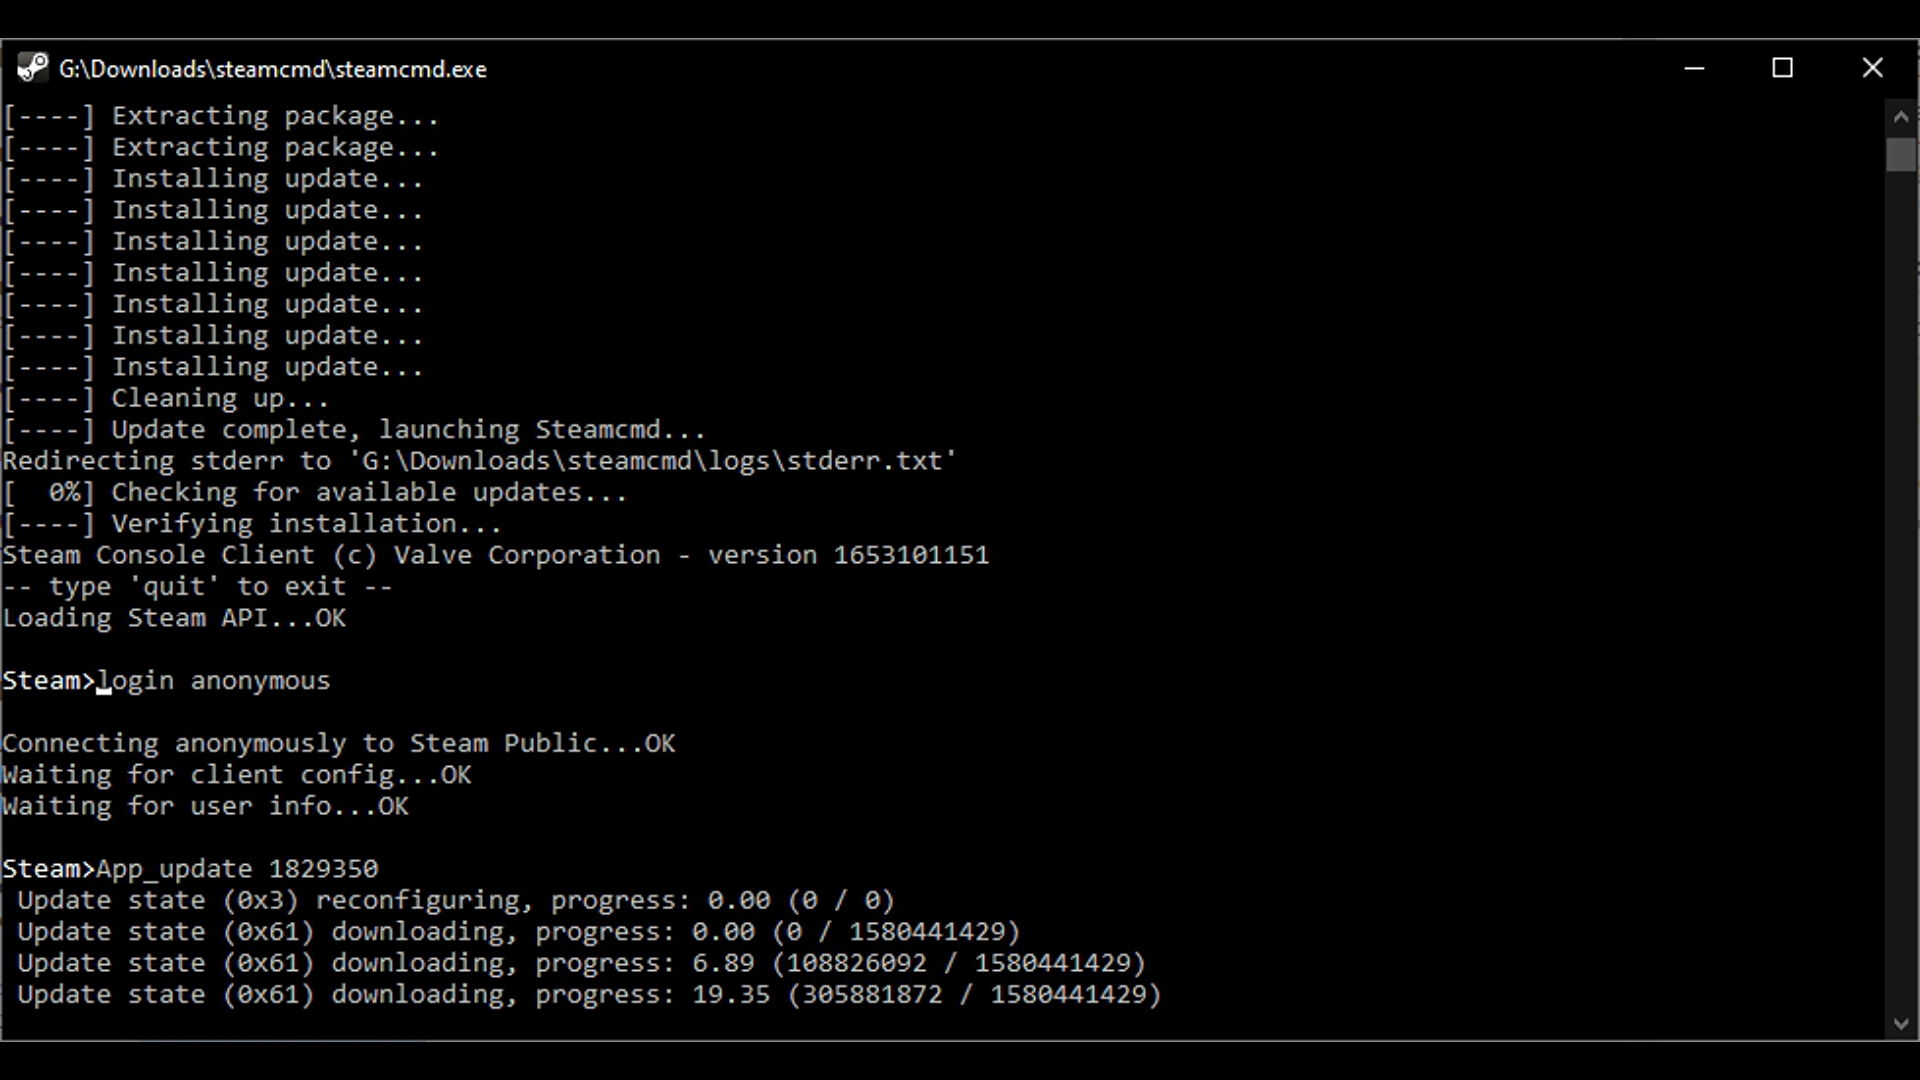
- Next, run “staemcmd.exe”.
- Now, sort in “login nameless” and proceed additional to login into Steam CMD.
- Furthermore, sort “App_update 1829350”. This will obtain all of the server recordsdata.
- Now to exit the app sort “exit”.
- Now discover your V Rising devoted server recordsdata in your Steam CMD folder underneath steamapps/frequent.
V Rising Server Settings
Now, that you’ve got acquired the server recordsdata, you’ll want to make a number of adjustments to make it customized for your self. First of all, you have to so as to add your server identify.
And to that merely right-click on the “start_server_example.bat” file after which edit it. First, add a server identify that will probably be proven within the server listing. To add a server identify you must sort in your server identify after “-serverName”.
Next, you require a save identify. The identify will probably be proven in your save recordsdata. To add the save identify simply repeat the above course of. But as a substitute of the “-serverName” sort “-saveName” after the identify you’ve chosen. After you’ve accomplished the above steps simply save the file after which exit the file.
Now make your approach to “VRisingServer_Data/StreamingAssets/Settings”. Here relaxation the 4 very essential recordsdata that you’ll want to edit.
- The first file is “banlist.txt”. Type right here the participant’s identify whom you wish to ban from the server.
- The subsequent file is “adminlist.txt”. Here you must sort the names of the gamers that you just wish to make admins of the server.
- The third file is “ServerHostSettings.json”. Open the file and edit it to alter the server settings.
- The final file is “ServerGameSettings.json”. Open it edit to alter the sport’s settings.
Open “ServerHostSettings.json” then edit in right here the server identify and save identify. Keep in thoughts that the names ought to match the names you typed within the “start_server_example.bat” file earlier. Furthermore, you possibly can add a password and description right here. The password is in order that solely gamers you need can be part of via it. While the description is the textual content that’s proven within the server listing to explain your server.
While you might be at it, keep in mind to pay attention to the numbers of “Port” and “QuestionPort” as you’ll require these later for the firewall entry and port forwarding. Now it can save you and exit the file. If you want you may as well edit the “ServerGameSettings.json” file to set PVP or PVE. Also, you possibly can change varied different points of the sport.
“ServerGameSettings.json” File Editing Option
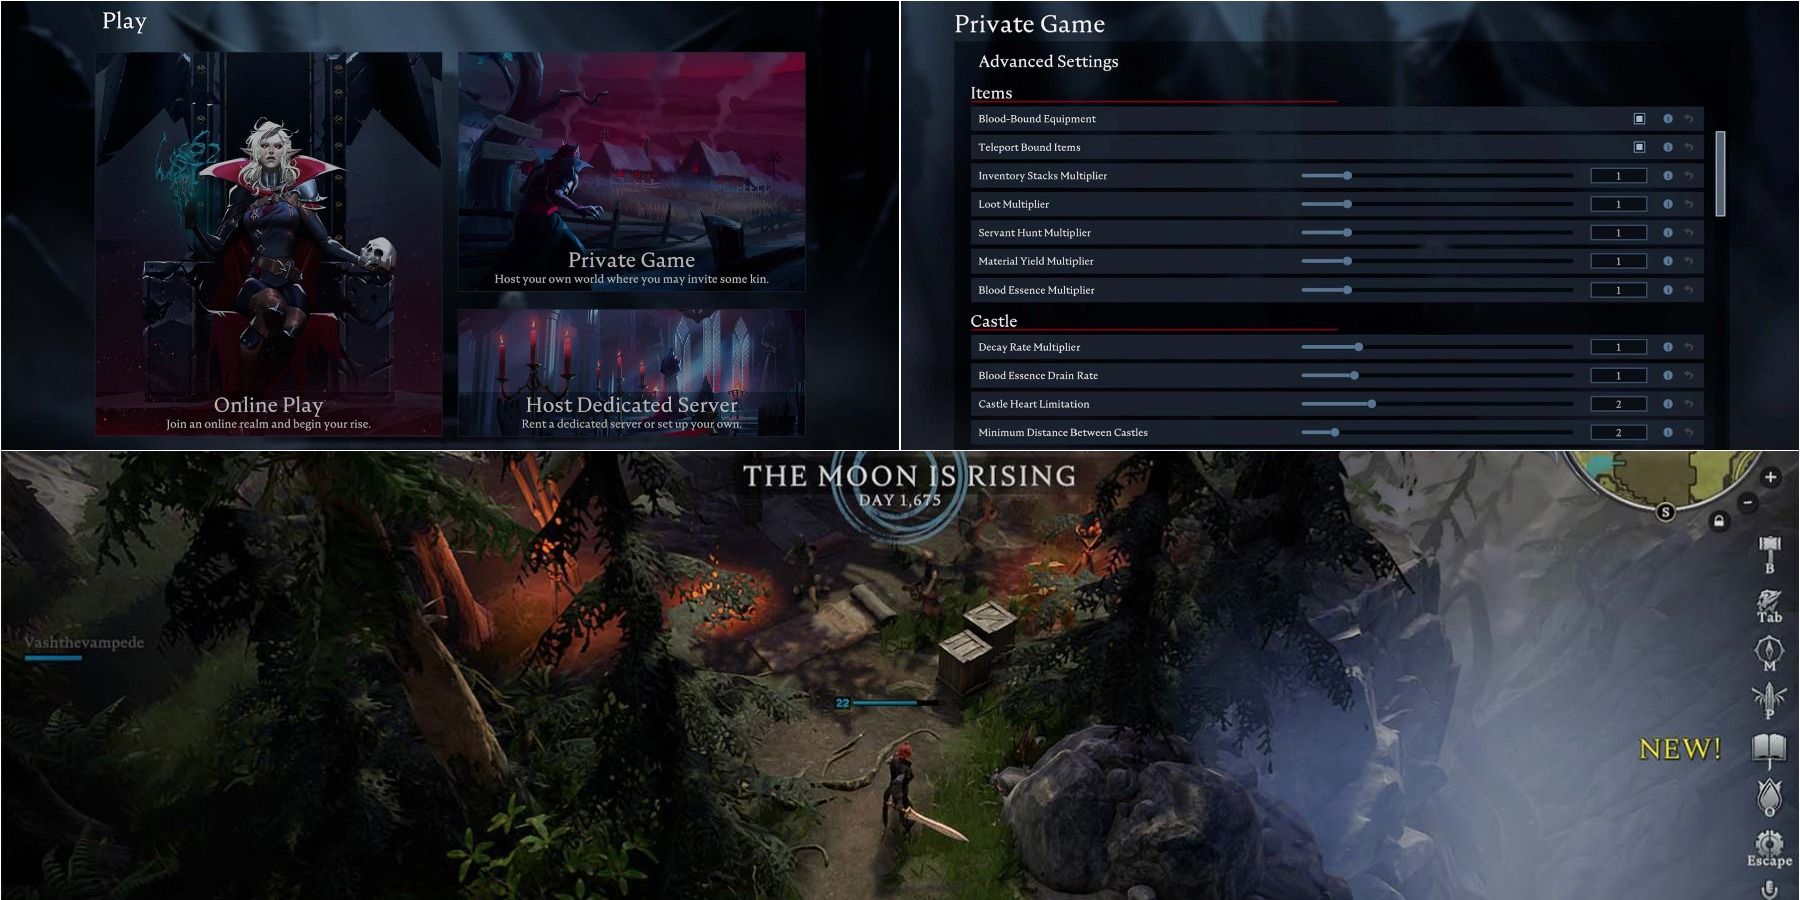
Now, we’ll talk about a number of the most essential points of V Rising you could change via modifying the “ServerGameSettings.json” file. It will principally change the in-game mechanics of the sport like clan measurement and extra. Here are a number of the essential instructions you could change within the file:
- First of all, “ClanSize”. Here you possibly can set the restrict for the general variety of gamers in a clan.
- Next is “BloodBoundEquipment”. If you “true” this part then upon demise it is possible for you to to preserve your stock.
- Now, “SunDamageModifier”. Changing the setting in right here will change the quantity of harm the solar does to a participant. By default, it’s set to 1.
- Furthermore, the “CastleLimit”. Here you possibly can set the variety of fortress hearts a participant can have. By default, the variety of fortress hearts is 2.
- Next, “CastleDecayRateModifier”. This part will decide the speed at which the fortress coronary heart will decay.
- Then there may be the “CanLootEnemyContainers”. If you set the setting to “true” then gamers can loot different gamers’ containers.
- After that, there may be additionally “GameModeType”. Basically right here you possibly can select the kind of recreation mode. PVP or PVE.
- Next is the “DayDurationInSeconds”. Now right here you possibly can set the variety of seconds it takes to finish an entire cycle of day and evening. By default, it’s set to 1080.
- Now subsequent up is double bother. “VSPlayerWeekdayTime” and “VSPlayerWeekendTime”. These might be altered to set instances and days on which gamers can assault one another. These are solely attainable for PVP servers.
- Well, it’s simply your fortunate day as now we have received one other double file. “VSCastleWeekdayTime” and “VSCastleWeekendTime”. These might be altered to set instances when gamers can raid different gamers’ castles.
If you might be enjoying on a PVP server then you’ll require a number of the greatest PVP weapons. So why not learn the Best PVP Weapons and Best PVP ultimate abilities Guide.
Starting The Server
Now that you’ve got utterly arrange your devoted server, you may be questioning the best way to begin it. Well, beginning the server isn’t so difficult. All you must do is to open the “start_server_example.bat” file. After opening it a black window will open with a bunch of textual content. If these strains seem then you’ve achieved it. Your server has began completely and works fantastic.
Closing Down TheServer
Now if for some motive you must shut your server down then simply click on on the black server window. Then click on “Ctrl+C”. After a short while, a immediate will pop up. “Terminate batch job (Y/N)?”. If you wish to shut the server then merely sort “ y “. This will successfully shut the server down.
Now to make your server joinable you will have to tweak a bit your firewall and port forwarding.
Port Forwarding
Port Forwarding and Firewall are essential in the event you run into any sort of becoming a member of error or any sort of server concern. These two issues have to be achieved accurately so that folks can simply be part of your V Rising Server.
First of all, to make your server simple for others to affix you’ll want to arrange Port forwarding. And for that, you first must know your router’s IP tackle. By the way in which, the method of port forwarding is totally different for everybody in line with their router.
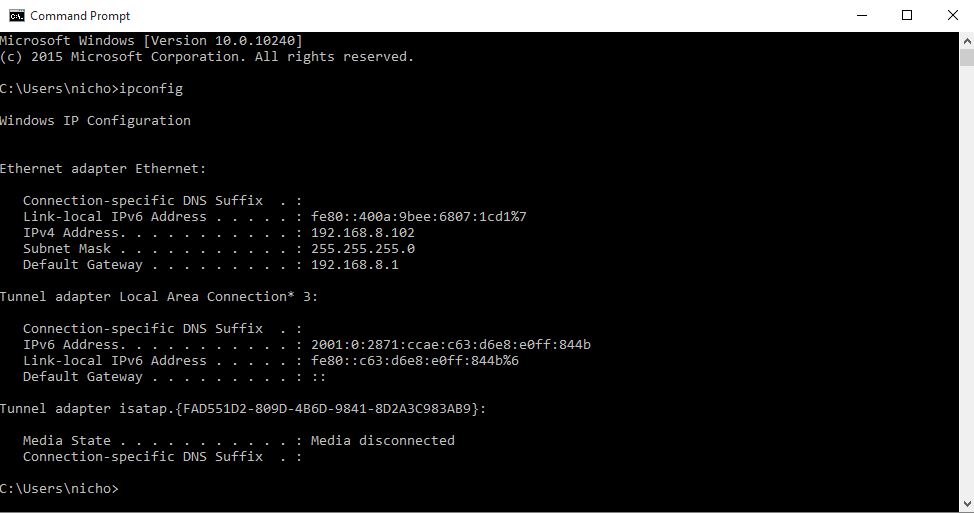
Now, discovering your router’s Ip tackle could be very easy. First in your keyboard press “Windows Start Button+R”. Now the run tab will open. Then sort “cmd” within the Run tab. Next, sort “ipconfig” within the tab that seems. Now pay attention to the quantity subsequent to “Default Gateway”.
The quantity is normally “192.168.0.1” or “192.168.1.1”. While you might be at it, additionally pay attention to your IPV4 quantity.
Now that you’ve got discovered the IP tackle, you’ll use the quantity to login into your community software. Type the IP tackle within the web browser tab. This will lead you to the community software. Where you’ll observe the steps supplied by the community software for the Port forwarding.
After that use the “Port” and “QuestionPort” numbers that you just famous earlier within the “ServerHostSettings.json” file. You will even require the IPV4 tackle that you just famous earlier.
Server Firewall
Now that the Port forwarding has been achieved, you’ll require to permit the port via the firewall. This will certainly permit others to affix the devoted servers. If you might be utilizing Windows then observe the next steps to permit the port via the firewall:
- First of all, attain the run tab by urgent “Start+R” after which sort “wf.msc” within the run tab.
- Now choose “Inbound Rules” after which press “New Rule”.
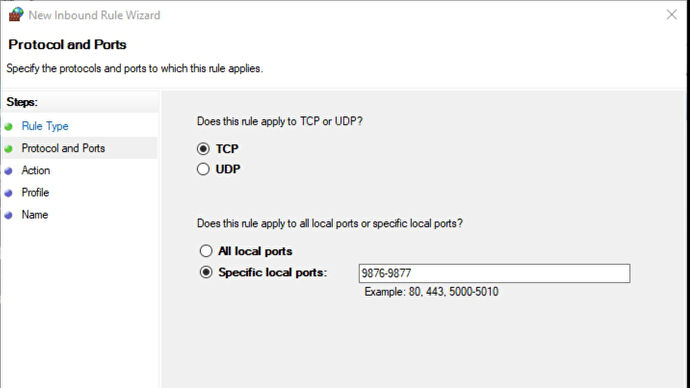
- Furthermore, choose “Port” after which press “TCP”. Now right here sort the ports that you just present in port forwarding. Separate them by commas.
- Next, click on “Allow the Connection”. Then on the subsequent display screen that pops verify all of the bins. After that identify the brand new add-on after which hit “Finish”.
- Now repeat the identical steps to arrange one other add-on for a similar ports. However, this time utilizing “UDP” as a substitute of “TCP”.
Joining A Dedicated Server in V Rising
Now, Joining a devoted V Rising server is an easy course of. All you must do is begin the sport after which discover Display all Servers & Settings underneath Find Servers which is additional underneath Online Play.
Now just be sure you have chosen the appropriate filter choices. Next, sort your server’s identify and simply hit “Join”.
Alternative Method To Join A Server
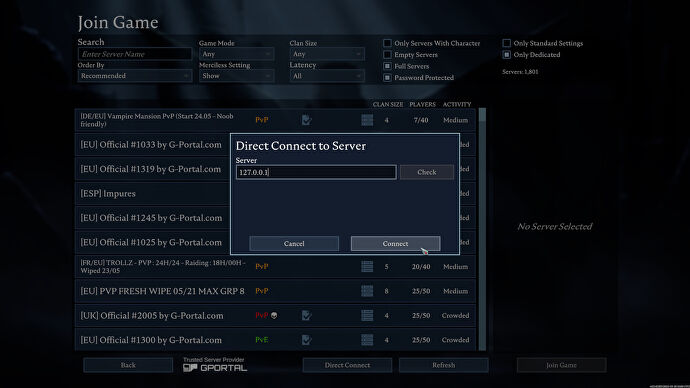
Well now for many who can’t appear to affix the server utilizing the primary methodology, luckily, there may be an alternate method. First, you must hit the “Direct Connect” possibility within the be part of server part in V Rising. Now relying in your case sort the IP tackle.
- The first case is if you’re becoming a member of from the PC from the place the server is working. In this case, use “127.0.0.1” to affix instantly into the server.
- The subsequent case is if you’re not on the identical community because the machine on which you might be working the server. For the state of affairs, you’ll have to sort the server machine’s exterior IP Address to affix.
- Now, if you’re becoming a member of from a PC that’s on the identical community because the machine that runs the server. In this case, you’ll have to sort the server’s IPV4 tackle.
Turning Your Private V Rising Game Into A Dedicated Server
Yes, it’s attainable to show your personal V Rising recreation right into a Dedicated server. However, to try this you’ll have to observe the next steps:
- First, make a brand new server with a brand new save file identify. After that, begin the server.
- Now be part of the server and create a brand new character.
- Next, make your approach to “save-data/Saves/v1/[your server’s save name]”. Now on this location delete all of the recordsdata besides the “SessionId.json” file.
- Furthermore, sort “%Appdata%..LocalLowStunlock StudiosVRisingSavesv1” in your home windows search tab. Here are situated all of your V Rising saves. To establish which one is required simply open every folder”s “ServerHostSettings.json” file to search for the save identify.
- Now that you’ve got situated the required file, simply make a backup of those recordsdata, simply in case. Next, copy-paste these recordsdata to the placement of “save-data/Saves/v1/[your server’s save name]”. These will principally exchange the recordsdata that you just deleted.
- Now come again to “%Appdata%..LocalLowStunlock StudiosVRisingSavesv1”. From right here copy “ServerGameSettings.json” and “ServerHostSettings.json” recordsdata.
- Now make your approach to “%Appdata%..LocalLowStunlock StudiosVRisingServer”. Here one can find a settings folder. If there is no such thing as a settings folder then create one. Now, this folder and paste the 2 .json recordsdata.
Now, you probably have adopted the above steps accurately then you must be capable of be part of the server. And you get to maintain all of your progress from the personal world.
Well, we hope that you just discovered the information very detailed and informative as we tried our greatest to cowl every part required to arrange your personal devoted server and the best way to tweak its settings.
Players which were enjoying multiplayer on-line video games for some time might know that a lot of these video games work on a server-based system. And V Rising is not any exception. If you’re keen on blood-sucking vampire video games then V Rising is the sport for you.
It acquired 9/10 from Steam and seven/10 from IGN. V Rising is a Massive Multiplayer Online recreation that additionally follows the pattern of servers. Well if you’re new to V Rising then learn V Rising Ultimate Guides for a greater understanding of the sport.
https://exputer.com/guides/v-rising-server-settings/