This is a multi-part article. In Part 1., we revealed how big law firms in Australia are susceptible to direct email spool attacks and what the implications had been. In a nutshell, we discovered that the e-mail safety resolution at one-third of the legislation corporations assessed might be circumvented with a easy trick. Part 2. reveals how we used a handful of open-source intelligence (OSINT) data sources to identify misconfigured email servers.
Prerequisites of the Proof of Concept Server
Although it was straightforward to arrange a primary e-mail server, it was essential to configure the whole lot appropriately to make sure most deliverability of the outgoing emails.
Our e-mail supply infrastructure was:
- A digital server operating Postfix mail server on Ubuntu 18.04 LTS;
- A site identify; and
- An e-mail shopper.
Virtual Server
We picked certainly one of the common low-end VPS suppliers to host our e-mail server. We most well-liked to run our Postfix e-mail server on Ubuntu 18.04 LTS, however different working programs and mail transport brokers may additionally work nice.
We discovered that the digital server supplier (VPS) was blocking the outgoing TCP port 25 to stop any e-mail abuse. To resolve this, we needed to increase a ticket for asking the technical assist to depart the community port unblocked.
The second most necessary factor was the pristine fame of the IP handle. As our most well-liked VPS supplier assigns the IP handle mechanically to the new digital server, we needed to manually test if the IP handle is on a blacklist wherever. We used the IP reputation lookup tool at MXToolbox to question the IP handle towards the hottest DNSBL block record. Luckily, the IP handle was ‘clear’.
Once we bought a site identify and our digital server was operating, we needed to create the obligatory ahead and reverse DNS data, in any other case, spam filters would have flagged our emails as suspicious and moved them to the junk e-mail folder.
Note: We will use instance.com.au as the area identify all through this configuration information. Replace this with your personal area identify as relevant.
First of all, we needed to create an A report for our brand-new mail server used for the evaluation.
mail.instance.com.au. A
Then we created an MX report to begin accepting mail on our area:
instance.com.au. MX 10 mail.instance.com.au
The PTR report was additionally important as spam filters could reject emails coming from SMTP servers with a lacking reverse report.
We additionally added the following TXT report for creating our SPF report:
instance.com.au. TXT “v=spf1 a mx ~all”
As for the DKIM report, we created it afterward as a part of the Postfix configuration course of.
Finally, we created a DMARC report to tie the SPF and future DKIM data collectively. We added the following DMARC coverage:
_dmarc.instance.com.au. TXT v=DMARC1; p=none;
Configuring the Postfix SMTP Service
Once the IP handle, area identify, DNS data and the VM had been all sorted, we logged into the server through SSH.
To set up and configure Postfix e-mail server, we had to ensure the working system was updated:
# apt replace && apt improve
Then we put in the Postfix and OpenDKIM packages:
# apt set up postfix mailutils opendkim opendkim-tools
Once the set up was full, we opened /and many others/postfix/major.cf file in our favorite textual content editor and added (or modified) the following parameters as the following:
myhostname = mail.instance.com.au   # This is the identical host identify as the A report we created earlier
mydomain = instance.com.au  # This is the area identify we bought
myorigin = $mydomain
mydestination = $myhostname, $mydomain, localhost.$mydomain, localhost
home_mailbox = Maildir/
smtpd_sasl_type = dovecot
smtpd_sasl_path = non-public/auth
smtpd_sasl_auth_enable = sure
smtpd_sasl_security_options = noanonymous
broken_sasl_auth_clients = sure
smtpd_sasl_local_domain = $mydomain
smtpd_recipient_restrictions =
	permit_mynetworks
	permit_sasl_authenticated
	permit_auth_destination
	reject
smtp_header_checks = regexp:/and many others/postfix/smtp_header_checks
# We will specify right here the place we wish to feed our emails
transport_maps = hash:/and many others/postfix/transport
# OpenDKIM settings for DKIM-signing our outgoing emails
milter_default_action = settle for
milter_protocol = 2
smtpd_milters = native:opendkim/opendkim.sock
non_smtpd_milters = native:opendkim/opendkim.sock
We added the following entries to /and many others/postfix/smtp_header_checks to guard our privateness. This setting removes numerous e-mail headers from the outgoing emails.
/^Received: .*/		IGNORE
/^User-Agent: .*/	IGNORE
/^X-Originating-IP:/    IGNORE
/^X-Mailer:/            IGNORE
/^Mime-Version:/        IGNORE
/^User-Agent:/          IGNORE
/^Subject:/		WARN
We ran the following command to confirm that the Postfix configuration information had been free from any errors:
# postfix test
Then we added our first e-mail consumer. The ‘myuser’ on this instance was the username half earlier than the ‘@’ image in our e-mail handle.
# adduser myuser
The command was asking us to enter a password for the new consumer. We needed to save the password for later as this password was the SMTP and IMAP login credentials as effectively.
Configuring the DKIM Signing
To configure OpenDKIM for digitally signing each outgoing e-mail, we had so as to add the opendkim consumer to the postfix group first:
# gpasswd -a postfix opendkim
Then we opened the /and many others/opendkim.conf file and altered the following strains like the following:
Canonicalization        relaxed/easy
Mode                    sv
SubDomains              no
We additionally added the following strains to the configuration file:
AutoRestart             sure
AutoRestartRate         10/1M
Background              sure
DNSTimeout              5
SignatureAlgorithm      rsa-sha256
We modified the Socket parameter to the following:
Socket native:/var/spool/postfix/opendkim/opendkim.sock
Finally, we added the following strains to the finish of the configuration file:
KeyTable           /and many others/opendkim/key.desk
SigningDesk       refile:/and many others/opendkim/signing.desk
ExternalIgnoreList  /and many others/opendkim/trusted.hosts
InternalHosts       /and many others/opendkim/trusted.hosts
We saved opendkim.conf and created a listing construction for OpenDKIM then:
# mkdir -p /and many others/opendkim/keys
# chown -R opendkim:opendkim /and many others/opendkim
# chmod go-rw /and many others/opendkim/keys
# mkdir /var/spool/postfix/opendkim
# chown opendkim:postfix /var/spool/postfix/opendkim
We opened /and many others/opendkim/signing.desk file and added the following line:
*@instance.com.au p1._domainkey.instance.com.au
We saved the file and opened /and many others/opendkim/key.desk for including the following:
p1._domainkey.instance.com.au instance.com.au:p1:/and many others/opendkim/keys/instance.com.au/p1.non-public
Finally, we up to date /and many others/opendkim/trusted.hosts with the following strains:
127.0.0.1localhost*.instance.com.au
It was time to generate your DKIM keys. We created the following listing:
# mkdir -p /and many others/opendkim/keys/instance.com.au
Then we created the signing keys:
# opendkim-genkey -b 2048 -d instance.com.au -D /and many others/opendkim/keys/instance.com.au -s p1 -v
We set the permissions:
# chown opendkim:opendkim /and many others/opendkim/keys/instance.com.au/p1.non-public
Creating the DKIM Record
Then we took the contents of the /and many others/opendkim/keys/instance.com.au/p1.txt file and created the DNS report holding our DKIM public key.
For instance, our file featured the following entry:
p1._domainkey	IN	TXT	( "v=DKIM1; h=sha256; okay=rsa; "
	  "p=MIIBIjANBgkqhkiG9w0BAQEFAAOCAQ8AMIIBCgKCAQEA2ds4zLgOQammxc6NUOOuGtMZBbpefjkjFmui+EmBR5zybOqZfSxjfVY59AsO0sqYsr6QhOChr8co230wBwjcDOGhCHxX3ifxks0l6XkdRtwBHP2Cr8wWAAzRMek/tIvchWWy6NEzGTpR1cQvwWpHPsR2iP+DQlqqOAQ6FUY/bVqAEU4JdKGXv2kZU4lSMvGj7IC0L7VVvOw9Ds"
	  "DJPklskxg+qinrPh58EZBGKOzzJ+6sJlUUHacr3oaMhnaxiQzKLwySjsEIlyuJwu/CgUMlF1smTCq4djpuv5OwgUOHpGcuqoftJAzsdPtIOxGrE1tFOOHar9NI+L8tUdFy2eW9ewIDAQAB" )  ; ----- DKIM key p1 for instance.com.au
After eradicating the newlines and whitespaces, we added the following to our DNS report:
p1._domainkey.instance.com.au TXT v=DKIM1; h=sha256; okay=rsa; p=MIIBIjANBgkqhkiG9w0BAQEFAAOCAQ8AMIIBCgKCAQEA2ds4zLgOQammxc6NUOOuGtMZBbpefjkjFmui+EmBR5zybOqZfSxjfVY59AsO0sqYsr6QhOChr8co230wBwjcDOGhCHxX3ifxks0l6XkdRtwBHP2Cr8wWAAzRMek/tIvchWWy6NEzGTpR1cQvwWpHPsR2iP+DQlqqOAQ6FUY/bVqAEU4JdKGXv2kZU4lSMvGj7IC0L7VVvOw9DsDJPklskxg+qinrPh58EZBGKOzzJ+6sJlUUHacr3oaMhnaxiQzKLwySjsEIlyuJwu/CgUMlF1smTCq4djpuv5OwgUOHpGcuqoftJAzsdPtIOxGrE1tFOOHar9NI+L8tUdFy2eW9ewIDAQABOnce the DNS report was created, we might check it by operating the following command:
# opendkim-testkey -d instance.com.au -s p1 -vvv
The following response advised us that the key was added appropriately:
opendkim-testkey: key OK
We ran a ultimate check of the configuration information, then restarted the OpenDKIM and Postfix providers to use the new adjustments:
# postfix test
# systemctl restart opendkim
# systemctl restart postfix
Installing Dovecot IMAP Service
The following step was putting in and configuring the IMAP service operating on Dovecot. We needed to set up certbot first for acquiring a legitimate SSL certificates for the SMTP and IMAP providers.
# apt set up certbot dovecot-imapd
We requested a brand new certificates for Dovecot and Postfix with the following command:
# letsencrypt certonly --standalone -d mail.instance.com.au
We added the following strains to /and many others/postfix/major.cf for enabling SSL/TLS on Postfix:
smtpd_tls_cert_file=/and many others/letsencrypt/dwell/mail.instance.com.au/fullchain.pem
smtpd_tls_key_file=/and many others/letsencrypt/dwell/mail.instance.com.au/privkey.pem
smtpd_use_tls=sure
smtp_tls_security_level = could
smtp_tls_loglevel = 1
smtpd_tls_loglevel = 1
smtpd_tls_session_cache_database = btree:${data_directory}/smtpd_scache
smtp_tls_session_cache_database = btree:${data_directory}/smtp_scache
smtpd_tls_security_level=could
smtpd_tls_protocols = !SSLv2, !SSLv3
We verified the configuration file once more and reloaded Postfix to use the adjustments:
# postfix test
# systemctl reload postfix
Now we moved on to the configuration of Dovecot. We opened /and many others/dovecot/conf.d/10-ssl.conf for changing the self-signed certificates with the one we received from Let’s Encrypt:
ssl_cert = We opened /and many others/dovecot/conf.d/10-master.conf and appended the following beneath the # Postfix smtp-auth line:
  unix_listener /var/spool/postfix/non-public/auth {
    mode = 0660
    consumer = postfix
    group = postfix
  }
We opened /and many others/dovecot/conf.d/10-mail.conf to exchange the `mail_location` stanza as the following:
mail_location = maildir:~/Maildir
We edited /and many others/dovecot/conf.d/10-auth.conf then and commented out the following:
disable_plaintext_auth = sure
We added `login` to the `auth_mechanisms` possibility:
auth_mechanisms = plain login
We situated the auth_username_format possibility and altered the setting as the following:
auth_username_format = %n
We completed the configuration by reloading Dovecot:
# systemctl reload dovecot
Configuring Your Email Client
We fired up our favorite e-mail shopper for including our new e-mail account. The configuration particulars had been the following:
SMTP server: mail.instance.com.au:25
IMAP server: mail.instance.com.au:993
Enable encryption: sure
Username: [email protected]
Password: *******
The username and password are the particulars we entered when operating adduser earlier.
Once your e-mail server was up and operating, we made certain to ship just a few check emails at https://www.mail-tester.com for verifying that the whole lot is operating appropriately.

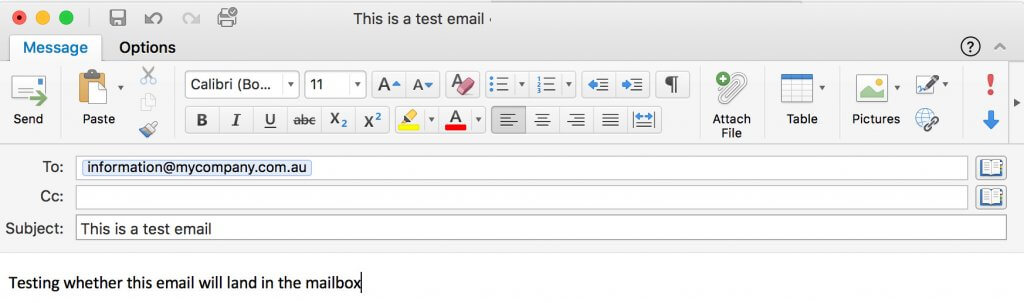
Deploying the First Email Transport Rule
Once the e-mail server was operating, it was time to check out with an actual e-mail. Let us assume we're assessing whether or not mycompany.com.au is prone to direct e-mail spooling assault. MyCompany subscribed to a preferred e-mail safety resolution a yr in the past and runs its personal Microsoft Exchange e-mail server to handle the organisation’s emails.
To implement our e-mail server utilizing a selected e-mail server to ship emails, we have to deploy a transport rule first. In this instance, we used one of the OSINT methods to disclose that MyCompany is exposing its Microsoft Exchange server on smtp01.mycompany.com.au to the web.
In this case, we now have to open /and many others/postfix/transport and add the following line:
mycompany.com.au :[smtp01.mycompany.com.au]
Then we now have to run the following command to use the adjustments:
# postmap /and many others/postfix/transport
The transport file specifies that each e-mail despatched to the mycompany.com.au area needs to be delivered by smtp01.mycompany.com.au as a substitute of the e-mail safety resolution specified by the MX data of mycompany.com.au. Now, all we have to is firing up the e-mail shopper and sending a check e-mail to [email protected].
If the distant server accepts the e-mail, we must always see the same line in /var/log/mail.log:
Sep 1 03:00:10 mail postfix/smtp[15079]: 13EA3814F1: to=<[email protected]>, relay=smtp01.mycompany.com.au[203.0.113.21]:25, delay=514, delays=507/0.02/2.2/5.2, dsn=2.0.0, standing=despatched (250 2.0.0 Ok: queued as 7A823C44B17 UID 5b9a75b434fb78cf)
If the distant server doesn't settle for emails from us (i.e. not weak to direct e-mail spool assault), the supply ought to generate an error like this:
Sep 1 05:39:54 mail postfix/smtp[15817]: AF2577F231: to=<[email protected]>, relay=smtp01.mycompany.com.au[203.0.113.21]:25, delay=3.1, delays=0.05/0/2.8/0.22, dsn=5.0.0, standing=bounced (host smtp01.mycompany.com.au[203.0.113.21]:25 stated: 550 Invalid recipient <[email protected]> (#5.1.1) (in reply to RCPT TO command))
Any undelivered messages in the supply queue might be listed with the following command:
# postqueue -p
Summary
Email safety is a sophisticated matter, and because of this, organisations continuously depart their native e-mail servers wide-open for cybercriminals. This oversight leaves organisations prone to phishing assaults as our latest report on direct email spool attacks demonstrates.
This easy how-to information demonstrates how straightforward it's to arrange an e-mail server for circumventing costly e-mail safety options defending giant organisations. All we would have liked is a digital server, a site identify, roughly $20 and a few free time to construct our infrastructure able to finishing up direct e-mail spool assaults.
Considering the rising number of Business Email Compromise (BEC) fraud, we urge you to evaluate the safety of your e-mail gateways to stop abuse.
This article was co-written by Gabor Szathmari and Nicholas Kavadias.